
You're standing at the grill in a Phoenix backyard, squinting through reflected glare while your guests cluster under the only patch of shade. The refrigerator door is hot, the prep counter is too short for the food you carried outside, and smoke keeps drifting toward the seating area. In San Diego, the same problem may look different: salt air attacks hardware, afternoon sun fades finishes, and a kitchen placed too far from the house turns every meal into a series of trips indoors.
Learning how to design an outdoor kitchen means designing for the conditions that will determine whether you use it. In California and Arizona, that means treating shade, ultraviolet exposure, wind, drought-conscious landscaping, heat, corrosion, circulation, utilities, and maintenance as part of the kitchen itself. Appliances matter, but they come after the site and the way people move through it.
Planning Your Outdoor Kitchen Workflow
A workable outdoor kitchen begins with the order of decisions, not the grill model. Start by defining how the space will be used, then assess the site, map circulation and utilities, choose materials for the climate, set the budget, and review the plan with a qualified contractor. Reversing that sequence creates predictable problems: a refrigerator sits beyond the practical gas or electrical route, a roof interferes with ventilation, or a dark countertop absorbs enough afternoon heat to discourage use.
Start with real outdoor habits
Record what happens in the yard on an ordinary week. Do complete meals happen outside, or does the cook mainly grill while plates and ingredients travel from the indoor kitchen? Do children move between the pool and patio? Do guests gather beside the cook, or remain at a dining table? In Arizona, those answers must be considered alongside shade and heat. In California, salt air, coastal wind, and irrigation overspray can affect placement and maintenance.
Build the plan around five working needs:
- Cooking: Select the main grill or cooking surface before adding specialty appliances.
- Preparation: Reserve enough counter space for chopping, seasoning, plating, and hot trays. Place it where direct western sun will not make the surface uncomfortable during dinner.
- Cold storage: Decide whether refrigeration serves ingredients, drinks, or both, then confirm that the location stays shaded and has an appropriate power route.
- Cleanup: A sink can reduce trips indoors, but it adds water, drainage, maintenance, and possible permitting requirements.
- Seating: Let guests speak with the cook without blocking doors, drawers, appliance clearances, or the main path through the yard.
Outdoor kitchens usually work as complete zones rather than isolated grill pads. Surveyed projects cluster in the 100 to 400 square foot range, with 66% in that band and 22% exceeding it, while 12% are under 100 square feet, according to outdoor kitchen sizing data from Ideal House. Treat those figures as context, not a target. A smaller footprint can support serious cooking when the sequence is efficient. A larger one can perform poorly if people must cross the hot zone to reach seating, the pool, or the house.

Follow a fixed design sequence
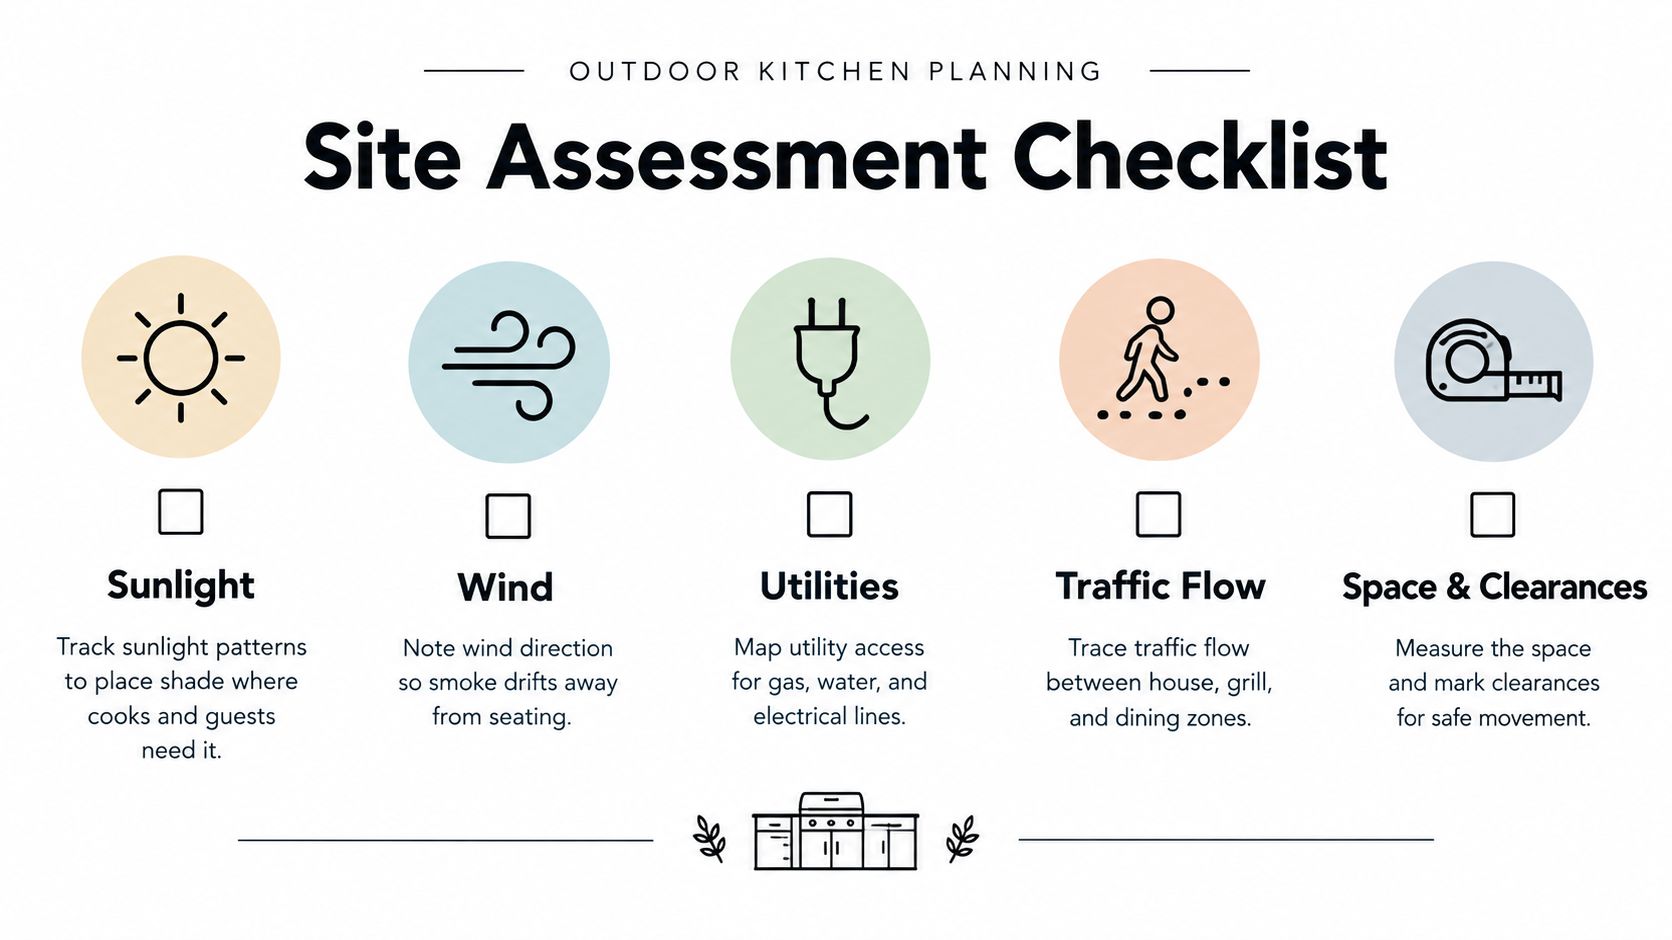
Study the site first. Track sun during breakfast, late afternoon, and expected entertaining hours. An unshaded west-facing counter in Arizona may be too hot to use when dinner preparation begins. In coastal California, check salt exposure, prevailing wind, and the direction rain reaches the structure. Look for glare from stucco, concrete, pool water, and light fencing, which can increase perceived heat and fade finishes.
Draw movement next. Mark the route from the indoor kitchen to the outdoor counter. Add paths to seating, the pool, the yard, and the bathroom. Keep the cook's working zone out of the main traffic line, especially where wet feet or running children are likely.
Map services before fixing cabinets. Locate gas, water, drainage, electrical circuits, lighting, and irrigation. Buried utility changes become expensive once paving and cabinetry are installed.
Choose finishes for exposure. Evaluate ultraviolet light, reflected heat, salt air, mineral deposits, and overspray. Review seams, edges, fasteners, hinges, and drawer slides, not only the visible panels. Drought-conscious planting can remain attractive, but spray heads and frequently watered containers should stay away from equipment and electrical points.
Price the work in phases. Structure, shade, the cooking surface, and preparation space may come first. Refrigeration, specialty cooking, extra storage, and decorative details can follow once the layout and services are proven.
Practical rule: Design for an ordinary Tuesday, then confirm the space can handle your largest gathering.
Site Assessment and Layout Flow
A late-afternoon test often exposes problems a drawing misses. In an Arizona yard, an unshaded west-facing counter can become too hot to use before dinner. In coastal California, salt air, wind, and reflected glare may affect both comfort and finish life. Assess the site during the hours you expect to cook, then place the kitchen around those conditions rather than around a showroom shape.
Start with heat, sun, wind, and water
Track sunlight from morning through evening. A coffee station may benefit from eastern shade, while a dinner kitchen usually needs protection from western exposure. Check glare from stucco, concrete, pool water, and pale fencing. These surfaces reflect heat into the work area and can accelerate fading on exposed finishes.
Wind needs a field check. Stand where the grill will sit and observe whether smoke travels toward doors, windows, dining chairs, or a neighbor's property. A solid wall may redirect smoke or hold heat against the cooking area. Partial screening, roof geometry, and appliance orientation can guide airflow without enclosing the fire in a hot box.
Water movement remains a concern in drought-prone yards. Irrigation overspray can leave mineral deposits on metal and wet cabinet bases, even when rainfall is scarce. Keep spray heads, thirsty planting, and frequently watered containers away from equipment, outlets, and electrical connections. Drought-tolerant planting can still provide shade and structure when it is positioned outside those vulnerable areas.
Walk the layout zone by zone
Zone 1: Cooking surface. Place the grill, burners, pizza oven, or other heat-producing equipment where smoke can leave the area and the cook has enough elbow room.
Zone 2: Prep counter. Provide a landing surface beside the cooking equipment for trays, utensils, ingredients, and cutting boards. A short route between prep and heat saves repeated trips across the yard.
Zone 3: Social space. Set tables, bar seating, and lounge chairs close enough for conversation, while keeping guests away from open flames, hot handles, and appliance doors.
The cook should move between the first two zones without crossing the main route to seating, the pool, the yard, or the bathroom. Mark those paths before fixing cabinet locations. A household that uses the space daily needs a different arrangement from one that cooks only during large gatherings.
Outdoor kitchens commonly include seating within the broader food-preparation area, reinforcing the value of planning for cooking and conversation together. Surveyed projects also report an average spend of about $13,000. Use that figure only as general context. The layout lesson is more useful: the project often serves as an entertaining area, not just a grill station. Review the outdoor kitchen size and use data when comparing your intended footprint with common project patterns.
A straight run works efficiently along a wall but puts every task in one line. An L-shaped arrangement can separate cooking from preparation and leave a useful corner for seating. A U-shaped plan creates more work surface, yet the opening must remain wide enough for people, doors, and loaded trays.
Test the footprint before construction
Mark the proposed footprint with painter's tape or stakes. Use boxes for the grill, refrigerator, sink, and counters. Open appliance doors, carry a loaded tray from the house, and walk the route while another person works at the counter.
Check the following:
- Can the cook turn without colliding with a guest?
- Can someone open the refrigerator while another person is prepping?
- Does the route to seating avoid the grill face and hot handles?
- Does shade cover the person working, not only the countertop?
- Can service technicians reach equipment without dismantling the kitchen?
For ideas on connecting patios, seating, and circulation, review these backyard patio design ideas. Use them for comparison, not imitation. Your own sun angles, irrigation lines, household traffic, and service access should determine the final arrangement.
A planning video can help compare layout types before committing to a drawing.
Reserve service access from the start. Outdoor appliances collect dust, pollen, grease, and mineral residue. If a technician cannot remove a panel or reach a connection, routine maintenance may require removing cabinets or paving.
Appliance and Material Selection for Hot Climates
A kitchen that looks excellent in a showroom can fail quickly in a California or Arizona yard. Direct sun, reflected heat, dust, salt air, pool chemicals, and mineral-heavy irrigation water all affect the appliances and finishes. Select materials for the harshest conditions on the site, then design the installation so those materials can dry, cool, and be maintained.
Choose stainless steel for the exposure
The usual grade decision is 316 stainless steel for coastal or high-salt environments and 304 stainless steel for drier inland settings. The guidance in this outdoor-kitchen materials resource supports matching the metal to its actual exposure rather than choosing by appearance alone.
That distinction matters in San Diego, coastal Orange County, and other locations affected by marine air. Inland California and Arizona usually place less corrosive stress on stainless steel, but intense sunlight, dust, heat cycling, and occasional moisture still test the installation. Specify suitable hardware as well. Hinges, screws, drawer slides, concealed brackets, and fasteners can corrode or fail even when the cabinet panels remain attractive.
Salt, vinegar, bleach, and chlorine can stain or pit stainless surfaces if residue stays in contact with them. Wipe spills promptly, use cleaners appropriate for the selected finish, and prevent pool chemicals or irrigation water from drying repeatedly on cabinet faces. In drought-prone areas, infrequent but heavy irrigation can leave concentrated mineral deposits, so maintenance should account for the water reaching the kitchen, not just the local climate label.
| Material Grade | Best For | Corrosion Resistance | Cost Consideration |
|---|---|---|---|
| 316 stainless steel | Coastal California and high-salt exposure | Stronger resistance where salt and corrosive conditions are a priority | Usually a higher material investment, justified when exposure is severe |
| 304 stainless steel | Drier inland California and Arizona locations | Good general resistance when maintenance and site conditions are controlled | Often a more economical choice for inland installations |
| Powder-coated metal | Covered areas where color coordination matters | Depends heavily on coating quality, edge protection, and damage control | Can offer design flexibility, but damaged areas need prompt attention |
| Masonry or stucco surrounds | Built-in, architectural installations | Resists weather when detailed correctly, but joints and water paths still require care | Installation can be labor-intensive and should be coordinated with utilities |
| Porcelain or other outdoor-rated slab surfaces | Countertops exposed to sun, staining, and frequent cleaning | Low-maintenance performance depends on product specification and installation | Premium options can cost more, but reduce concerns about fading and staining |
For a broader comparison of exterior surfaces, review these materials for outdoor decks. The same selection test applies to an outdoor kitchen: evaluate sun exposure, water paths, edge details, heat, and the maintenance routine together. A finish that performs well on a shaded patio may struggle on a west-facing counter beside a stucco wall.
Select appliances by use, not showroom appeal
Start with the appliance used most often. A grill needs a stable, heat-tolerant setting, adequate ventilation, and enough landing space for food and hot cookware. A refrigerator performs better in shade and should not sit in a sealed enclosure that traps heat. A sink requires more than a visible faucet. Allow for water supply, drainage, cleaning access, and winterization where local conditions require it.
Choose fuel based on cooking habits and site constraints. Propane can simplify placement where extending a gas line is impractical. Natural gas can suit a fixed kitchen connected to an existing service, provided the route, pressure, shutoff, and local requirements are reviewed by the appropriate professional. Fuel preferences discussed in the earlier fuel data above should inform the decision, but they should not override the actual utility plan or the kitchen's location.
A second grill may suit a household cooking different foods at different temperatures or hosting frequently. It is a lifestyle choice, not an automatic upgrade. Compare its value with the prep surface, shade, storage, cleaning access, and long-term service space it displaces.
Heat also changes how people experience the materials. Dark counters and metal handles can become uncomfortable in direct sun, while refrigerator doors and electronic controls can suffer beside a hot grill. Put touch points in shade where possible, choose outdoor-rated products, and follow manufacturer clearances. Durable components still fail when heat, ventilation, and enclosure details are poorly coordinated.
Utilities, Permits, and Code Compliance
In California and Arizona, utility mistakes become climate problems quickly. A refrigerator placed beside a west-facing grill can overwork through a hot afternoon. An enclosed gas appliance can trap heat, while drought-prone sites may require careful drainage and water planning. Draw the utility layout before fixing the cabinet dimensions, because gas, water, drainage, electrical service, ventilation, and sun exposure all compete for space.
Map every service and appliance load
Prepare an appliance schedule listing every grill, burner, refrigerator, outlet, light, fan, heater, and specialty device. Share it with the designer, electrician, plumber, gas contractor, and permitting team. Exact equipment requirements determine circuit capacity, clearances, ventilation, and service access.
The electrical plan should identify:
- Circuit locations: Show every exterior receptacle and connection point.
- Protection: Plan outdoor outlets with GFCI protection from the start.
- Weather exposure: Specify equipment and enclosures rated for their locations.
- Access: Keep disconnects, junctions, and service points reachable after construction.
- Lighting: Separate task lighting at the grill and prep counter from ambient lighting around seating and paths.
The 2023 NEC expands GFCI protection to all outdoor outlets on dwelling units supplying single-phase branch circuits at 150 volts or less to ground and 50 amps or less, as summarized in this NEC outdoor-kitchen lighting and clearance guidance. Treat GFCI as part of the initial electrical design, especially where a sink, refrigerator, lighting system, or other powered appliance is nearby. Retrofitting protection after stone, stucco, and cabinets are installed usually means extra labor and limited access.
Treat plumbing and gas as design constraints
A sink requires a planned water route, shutoff, drainage method, cleanout access, and service path. In drought-conscious California and Arizona projects, avoid creating unnecessary runoff or a discharge point that conflicts with site drainage. Confirm local requirements before ordering cabinets, because cities and counties may regulate outdoor plumbing, wastewater, gas work, structures, and electrical installations differently.
Gas routing also affects the kitchen's location. Confirm the capacity and path of an existing natural-gas service, or determine whether propane storage and delivery fit the property. Keep shutoffs accessible, protect exposed components from intense sun, and maintain the manufacturer's clearances. Combustion appliances need adequate air movement. Enclosing them tightly can trap heat and create an unsafe installation.
Assemble the permit package early
Ask the contractor or design team which permits the local authority requires and who will obtain them. A practical package may include the site plan, kitchen layout, structural details for a pergola or roof, electrical information, plumbing and gas routes, appliance specifications, and finish details.
Common inspection problems include:
- Under-specified receptacles: The plan omits outlets or fails to show their locations.
- Non-weather-rated components: Indoor products are installed in exposed exterior areas.
- Blocked service access: Finished work hides panels, shutoffs, or junctions.
- Unclear ventilation: Cooking equipment lacks documented clearance or airflow.
- Uncoordinated trades: Electricians, plumbers, and installers use different drawings.
Local requirements can change the project sequence. Confirm who pulls each permit, who schedules inspections, which drawings the municipality expects, and how revisions will be handled. A contractor familiar with the specific California or Arizona jurisdiction can resolve conflicts before materials arrive, when changes are still manageable.
Budgeting and Contractor Collaboration
A workable budget starts with how the kitchen will be used, not with a catalog of appliances. As noted in the budget data above, homeowner spending varies widely. Those figures are broad planning context, not a quote for a California or Arizona property. Site access, utility distance, permits, shade structures, structural work, finishes, and appliance choices can change the total substantially. In hot, dry climates, cutting shade or drainage early often creates higher repair and comfort costs later.
Separate the structure from the upgrades
Price the project in layers. The first layer should make the space usable: a stable base, a shade or weather strategy, the primary cooking appliance, safe utilities, durable counters, and enough preparation area. Add refrigeration, a sink, storage, lighting, secondary cooking, and improved seating only after the working system is defined. Decorative cladding, specialty appliances, and entertainment features can follow.
Phasing works when future work is planned into the first installation. Provide capped utility routes where appropriate, preserve service access, and leave room for a later refrigerator or counter extension. A tight first phase can make expansion expensive, especially when a permanent wall blocks new connections or exposes equipment to direct Arizona sun.
Budget discipline: Don't cut shade, drainage, ventilation, or service access to pay for an appliance you'll use occasionally.
Create a written allowance for each visible and hidden category. Cover demolition, excavation, utility trenching, structural supports, permits, inspections, appliances, counters, cabinet interiors, lighting, finish work, cleanup, and changes. Ask which assumptions are provisional, because a low initial number often leaves out the work that makes the kitchen safe and durable.

Choose the contractor through the process
Ask prospective contractors how they coordinate design, permitting, construction, and final finishes. Request a written scope identifying who supplies appliances, verifies manufacturer clearances, coordinates inspections, and approves substitutions. In California and Arizona, also ask how the team will protect materials and unfinished work from intense sun, heat, dust, and seasonal storms.
NorCal Construction is one option for homeowners in these states because its service model covers design consultation, permitting, construction, material selection, and construction management. Whether you use that team or another qualified contractor, assign responsibility clearly and put decisions in writing.
Use one shared plan and decision log. Record the selected grill, fuel type, counter material, cabinet grade, shade design, utility routes, and allowance assumptions. Confirm changes before work proceeds. A current plan prevents the electrician, plumber, fabricator, and installer from working from conflicting information.
For homeowners familiar with remodeling decisions, this guide on planning a kitchen remodel provides a useful framework for priorities, scope, and collaboration. Outdoor work adds climate and utility complications, but the communication principles remain similar.
Beyond Appliances, Shade, Circulation, and Comfort
A kitchen can have excellent appliances and still sit unused. In the Southwest, the deciding factor is often whether the cook and guests can tolerate the space. Shade, airflow, seating, and surface temperature determine comfort more reliably than an extra burner or beverage feature.
Recent outdoor-design coverage identifies shade and shelter as central parts of current kitchen planning, with covered and modular layouts increasingly associated with regular, year-round use in this Elle Decor outdoor-kitchen trends coverage. The practical lesson is straightforward: protect the people first, then choose the equipment that fits the protected zone.
Design shade around the person working
A roof or pergola should shade the cook's face, hands, controls, and preparation surface during the hours the kitchen operates. A small overhead element that shades only the counter may leave the person standing in direct sun. In Phoenix, consider the low western sun as well as the high midday sun. In coastal California, design for glare and reflected heat, not only air temperature.
Ventilation and shade must work together. Keep manufacturer clearances around grills and combustion appliances. Don't close the cooking area beneath a roof without understanding how heat and smoke will escape. Slatted structures, carefully placed overhangs, and open-sided shelters can provide relief without turning the kitchen into a heat chamber.
Keep circulation generous and legible
A comfortable outdoor kitchen needs more than a clear path in front of the cabinets. It needs room for someone carrying a platter, a guest pulling out a chair, and a child passing through without entering the cook's operating area. Align paths with the house, dining space, pool, and yard so people don't cut directly across the grill.
Seating should stay near the action but outside the working envelope. Shade the seats as well as the counter, and use planting or low walls to define the zone without creating a barrier that traps smoke. In drought-conscious areas, select low-water planting suited to the local climate and keep irrigation away from electrical equipment and cabinet bases.
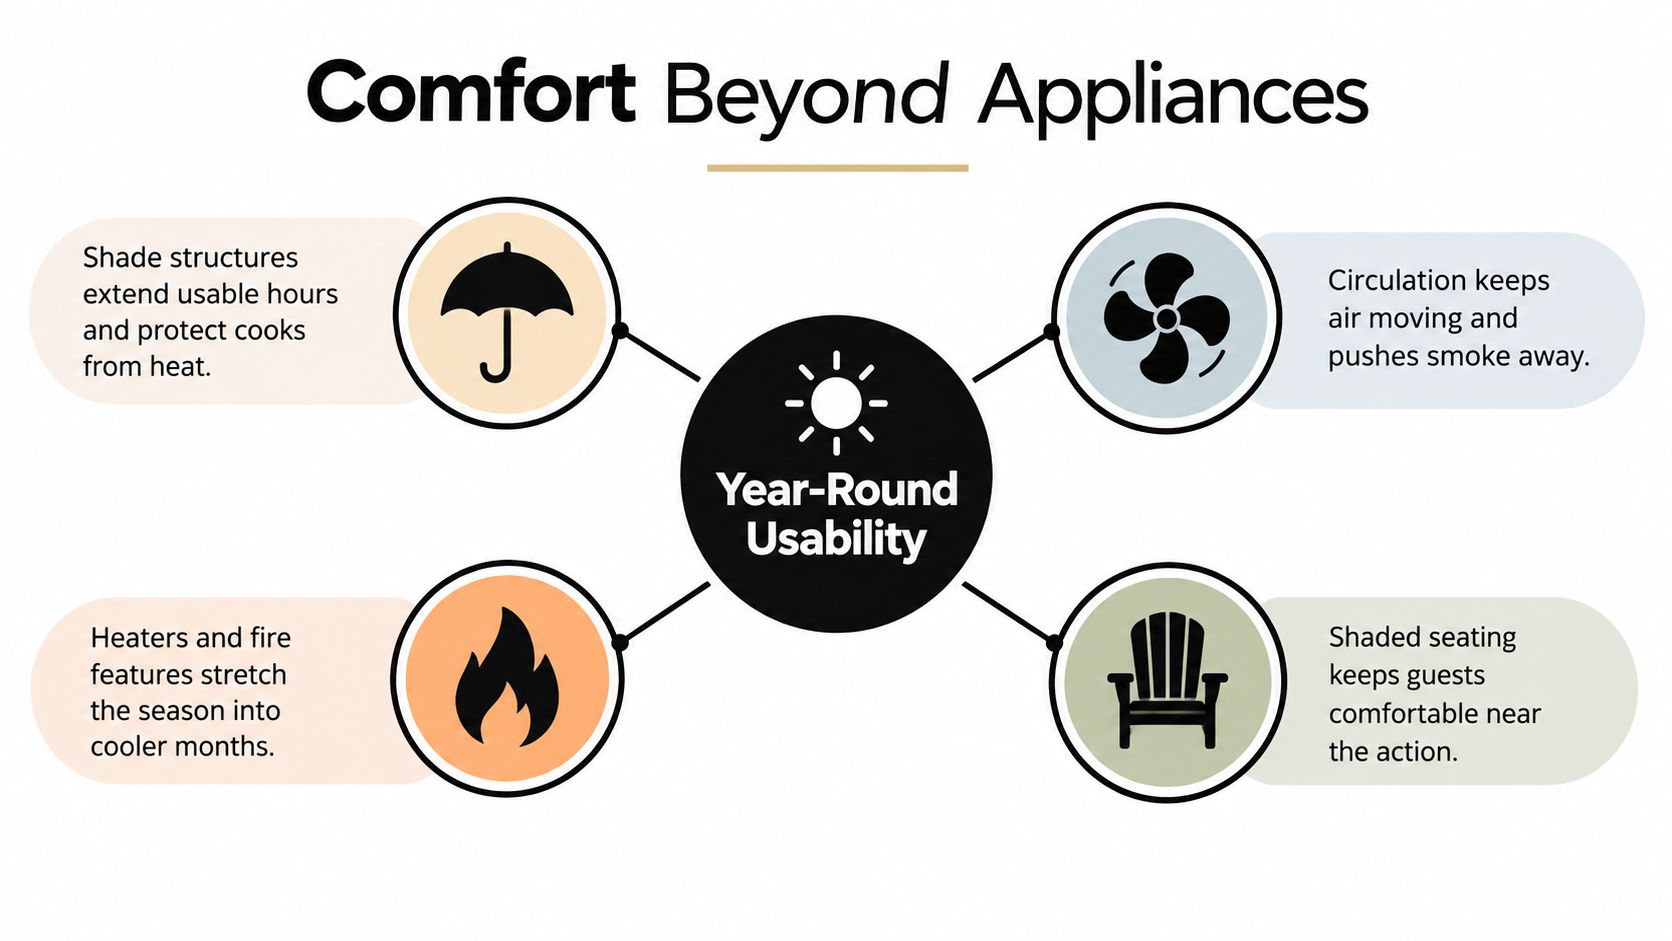
Cooler-season comfort may come from heaters, fire features, blankets, or a sheltered seating arrangement, but each addition introduces clearance, fuel, ventilation, or electrical questions. Plan those features with the structure rather than attaching them later. If the house itself struggles with summer heat, homeowners may also benefit from reviewing practical home cooling help before sizing an outdoor shade and comfort strategy.
More equipment creates capability. Shade and circulation create an outdoor room people will actually enter.
Putting It All Together, Your Next Steps
A durable outdoor kitchen is the result of several decisions agreeing with one another. The site determines the orientation. The orientation shapes shade and wind control. The workflow determines the counter and appliance arrangement. The climate determines materials and maintenance. Utilities and permits determine what can be installed safely, while the budget determines what belongs in the first phase.
Use this field-ready sequence
- Observe the backyard. Record sun, glare, wind, irrigation, drainage, access, and the route between the indoor kitchen and outdoor seating.
- Mark the zones. Identify cooking, preparation, dining, seating, service access, and traffic paths before selecting finishes.
- Choose essentials. Start with the primary grill, usable counter space, and the storage or refrigeration you'll use regularly.
- Specify for exposure. Match stainless grade, countertop, cabinet construction, hardware, sealants, and shade materials to coastal, inland, desert, or mixed conditions.
- Map utilities. Show gas, water, drainage, electrical points, GFCI protection, lighting, ventilation, and appliance clearances.
- Confirm local requirements. Ask the local authority or contractor which permits, drawings, inspections, and trade licenses apply.
- Price phases clearly. Separate required construction from optional appliances and decorative upgrades, then protect the first phase from scope creep.
- Test the layout. Tape the footprint, simulate doors and drawers, carry food through the route, and stand in the proposed shade during cooking hours.
A modular design can be a sensible starting point when you want flexibility. It lets the kitchen begin with the functions that matter most, provided the base, shade, utilities, and service access are planned for future additions. Custom construction may be the better fit when the yard has complex grades, difficult utility routes, a strong architectural connection to the home, or a shelter that must be integrated structurally.
Don't judge the finished project by appliance count. Judge it by whether you can prep without crossing a traffic path, whether guests can sit comfortably near the cooking action, whether the refrigerator remains serviceable, whether surfaces tolerate the local climate, and whether the kitchen still works when the sun is low, the wind changes, or the season cools.
Before signing a contract, walk the plan with a licensed contractor and ask for the complete scope, permit responsibilities, material specifications, appliance clearances, utility map, maintenance expectations, and change-order process. That conversation is where a backyard wish list becomes a buildable plan.
NorCal Construction helps California and Arizona homeowners plan and build outdoor kitchens with coordinated design, permitting, material selection, and construction management. Visit NorCal Construction to discuss a climate-appropriate layout that fits your property, cooking habits, comfort needs, and budget.