
An outdated tub can look like a cosmetic nuisance, but it may also signal poor space planning, failed waterproofing, difficult entry, or plumbing that no longer suits the household. A tub that worked for young children may become awkward for aging parents. A deep soaking tub may look appealing in a showroom but overwhelm a compact bathroom, consume too much hot water, or leave little room for safe movement.
The right bathroom tub remodel ideas depend on the space you have, how your household bathes, mobility needs, existing drain and supply locations, preferred finishes, and whether you're refreshing one wet area or rebuilding the room. A fixture swap has a different scope from moving plumbing, reinforcing a floor, rebuilding a shower wall, or converting the tub area into a curbless shower.
The options below organize eight tub remodel paths by homeowner goal, from luxury soaking and spa features to historic character, accessibility, and efficient use of space. Each one addresses design fit, installation decisions, advantages and drawbacks, budget context, maintenance, staging, and the boundary between reasonable DIY work and licensed trade work. California and Arizona requirements vary by municipality, so verify permits, inspections, electrical rules, plumbing requirements, and accessibility provisions before demolition.
1. Freestanding Soaking Tub Installation
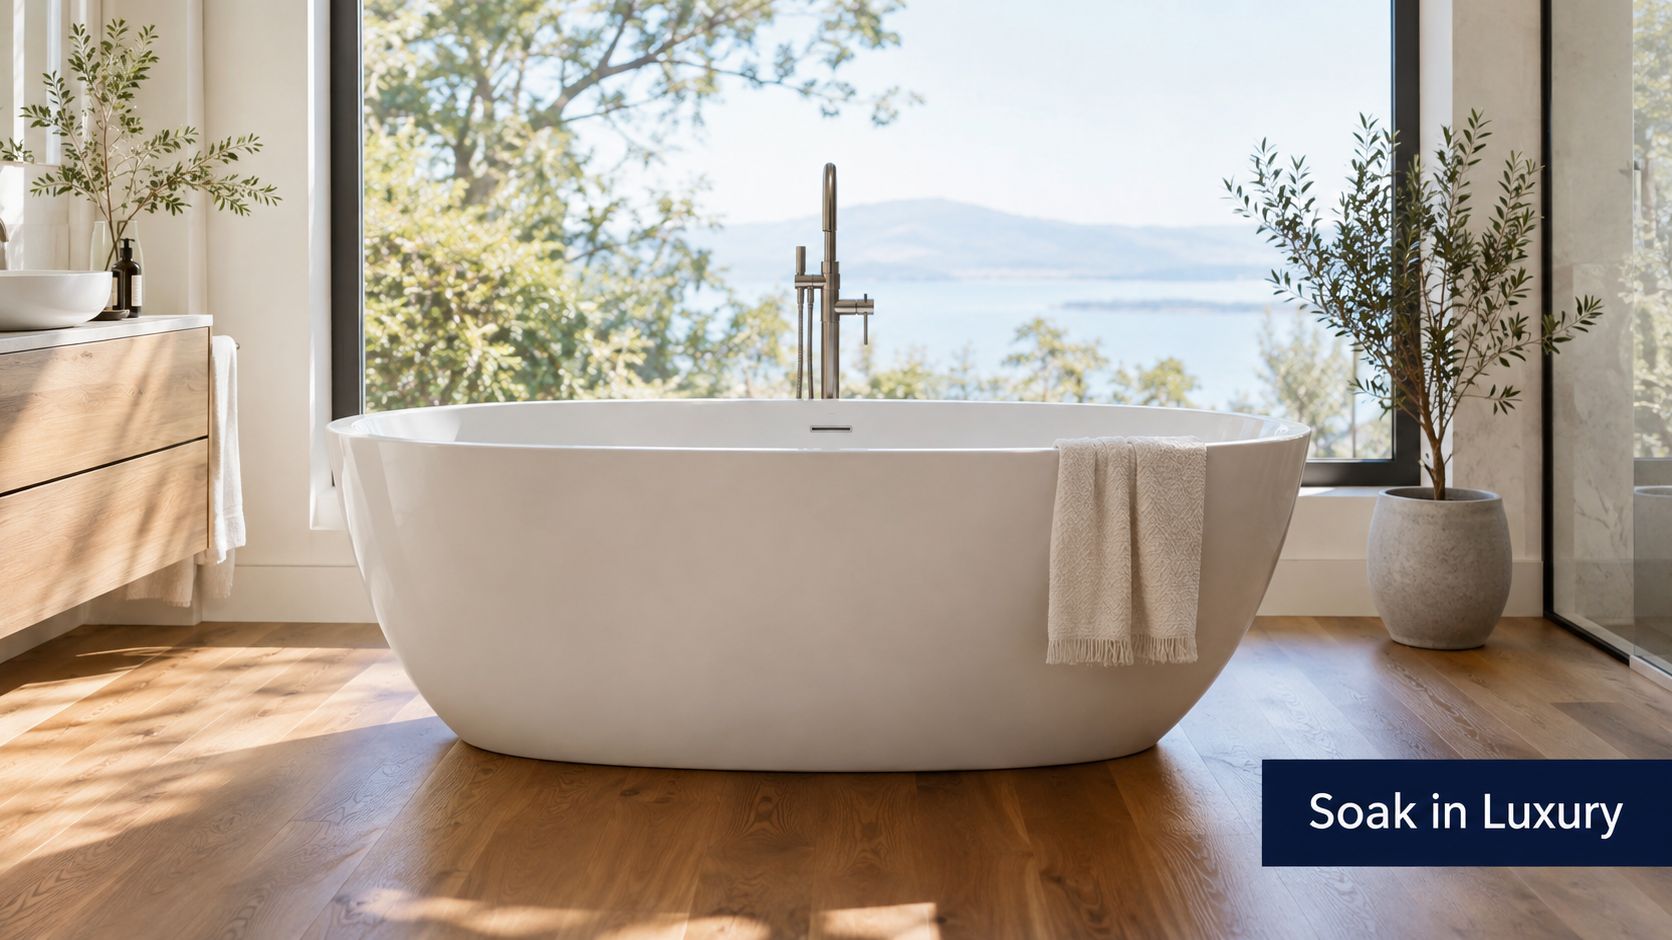
A freestanding tub makes the bath itself the visual centerpiece. White acrylic works well in a contemporary Northern California bathroom, while a stone soaking tub can suit an Arizona home with natural finishes. In a transitional room, a sculptural tub can sit opposite subway tile and brushed nickel fixtures without making the space feel overly ornate.
This approach needs more than a beautiful product selection. The floor must support the tub, the water, and the person using it. Cast iron and stone models can place substantial concentrated weight on a small area, so a contractor should inspect the framing before installation. The drain location also matters. Moving it through a slab or across framed flooring can add demolition and repair work that a simple tub replacement avoids.
Practical rule: Choose the tub only after confirming floor structure, drain placement, faucet location, and hot-water capacity.
A large tub can demand more hot water than an existing system comfortably supplies. Confirm the tub's actual capacity with the manufacturer, then discuss whether the home's water-heating setup can fill it without an unsatisfactory wait. Leave comfortable clearance around the rim so users can enter and exit without twisting around a wall, vanity, or towel warmer.
Where the freestanding look works best
Place the tub where it has a clear sightline from the bathroom entrance or bedroom, but don't sacrifice circulation for the sake of symmetry. A window can provide natural light and a view, yet privacy, solar heat, and window waterproofing deserve equal attention. In Arizona, direct sun can make a dark tub or surrounding stone uncomfortably hot. In Northern California, a poorly sealed window opening can create a moisture problem during the wet season.
Maintenance is straightforward when the floor beneath the tub remains accessible. Dust and hair collect around feet and under the rim, so plan for a mop head or cleaning tool to reach those areas. A freestanding tub is usually a professional installation when it requires new rough-ins, floor reinforcement, or slab work. DIY may be limited to selecting finishes, assembling accessories, or installing removable decor after the plumbing and waterproofing have passed inspection.
For context, the 2024 median spend for a primary bathroom remodel was $13,000, while major remodels of primary bathrooms 100 square feet or smaller reached a $17,000 median. Larger bathrooms held at a $25,000 median, and the top 10% of projects reached $60,000, according to the 2025 Houzz Bathroom Trends Study. A freestanding tub can fit within a refresh, but floor work, premium fixtures, tile, and layout changes can quickly move the project into a broader five-figure renovation.
2. Walk-In Tub With Safety Features
A walk-in tub addresses a different problem from an ordinary tub replacement. The built-in door reduces the need to step over a high wall, while an integrated seat, grab bars, and slip-resistant surfaces can make bathing more manageable for someone with limited balance or mobility. This option can work in a California multigenerational home, an Arizona retirement property, or an in-law suite intended to remain useful through changing family needs.
Start with the user, not the catalog. The door swing, transfer path, seat height, faucet position, and location of controls should match the person who'll use the tub. A model that looks accessible may still be difficult if the user must turn sharply, reach too far, or wait uncomfortably while the tub fills and drains. Test the seating position and controls in a showroom whenever possible.
Build safety into the framing
Grab bars should have reinforced backing installed before wallboard and tile. Surface-mounted bars added later may be limited by stud locations, while a properly planned backing system gives the household more flexibility. The floor may also need review because a filled walk-in tub is heavy, and the door, seals, and drain must be tested before the project is accepted.
Choose a textured surface that provides traction without becoming difficult to clean. Aggressive textures can hold soap residue, while smooth finishes can become slick when wet. Better lighting, reachable storage, and a clear path to the toilet and vanity matter just as much as the tub itself.
- Confirm the door seal: Run a full water test before final approval.
- Review floor engineering: Ask whether framing and subfloor conditions support the selected model.
- Coordinate code requirements: Verify local plumbing, electrical, and accessibility provisions before ordering.
- Plan for cleaning: Select removable panels and accessible service areas where the manufacturer allows them.
A walk-in tub is generally a professional project because it combines plumbing, waterproofing, structural review, and sometimes electrical work. DIY is appropriate only for limited finish decisions or noncritical accessories. NorCal Construction can coordinate the design and construction process through its bathroom remodeling services, including the planning questions that become important when a bathroom must serve more than one generation.
3. Spa-Style Jetted Tub Integration
A jetted tub suits homeowners who want massage and soaking in the primary bathroom, but it must be planned as mechanical equipment. Air jets provide a softer, usually quieter sensation. Whirlpool jets create stronger water movement and may require more attention to noise, cleaning, pump access, and ongoing maintenance. Choose the system around daily habits rather than the showroom display.
Confirm the installation requirements before framing begins. Some models call for a dedicated 20 to 30 amp circuit, with the circuit, disconnect, grounding, and wet-location protection configured to local requirements. The electrician and plumber should coordinate rough-ins before the walls close. Retrofitting wiring or supply and drain connections after tile installation can mean unnecessary demolition.
Plan around service and maintenance
A frequently used tub needs controls that the bather can reach and a cleaning routine the household will follow. Water lines and jets can retain residue unless they are flushed according to the manufacturer's instructions. Provide a removable access panel sized and positioned for pump service. The technician should be able to reach the equipment without removing finished tile or cabinetry.
Ventilation deserves attention during design, particularly in enclosed tub areas. Warm water and spray increase the moisture load, so the exhaust fan and air path must be adequate. In Arizona, cooling concerns can distract from bathroom ventilation. In coastal and inland California, poor air movement may leave condensation on mirrors, ceilings, and painted surfaces.
Decide these points before approving the tub:
- Jet type: Air systems feel softer, while whirlpool systems produce stronger water pressure.
- Service access: Keep the pump and controls reachable without damaging finished surfaces.
- Lighting: Select dimmable fixtures rated for the location, and control glare over the bather.
- Noise: Operate a comparable model if sound sensitivity affects the choice.
- Cleaning: Follow the manufacturer's line-cleaning and filter instructions, since ordinary surface cleaning does not clean internal passages.
The surround and access panel should be coordinated with the room's finish schedule. A contractor can check framing, waterproofing, plumbing, electrical work, ventilation, and manufacturer-specific testing as one workflow. Limited DIY work may include finish selections or noncritical accessories, but the tub installation itself is rarely suitable for a homeowner without the required trades.
NorCal Construction's bathroom remodeling portfolio shows how a spa feature can be coordinated with the rest of the bathroom rather than purchased as an isolated fixture.
4. Tile Surround and Shower Tub Combo Modernization
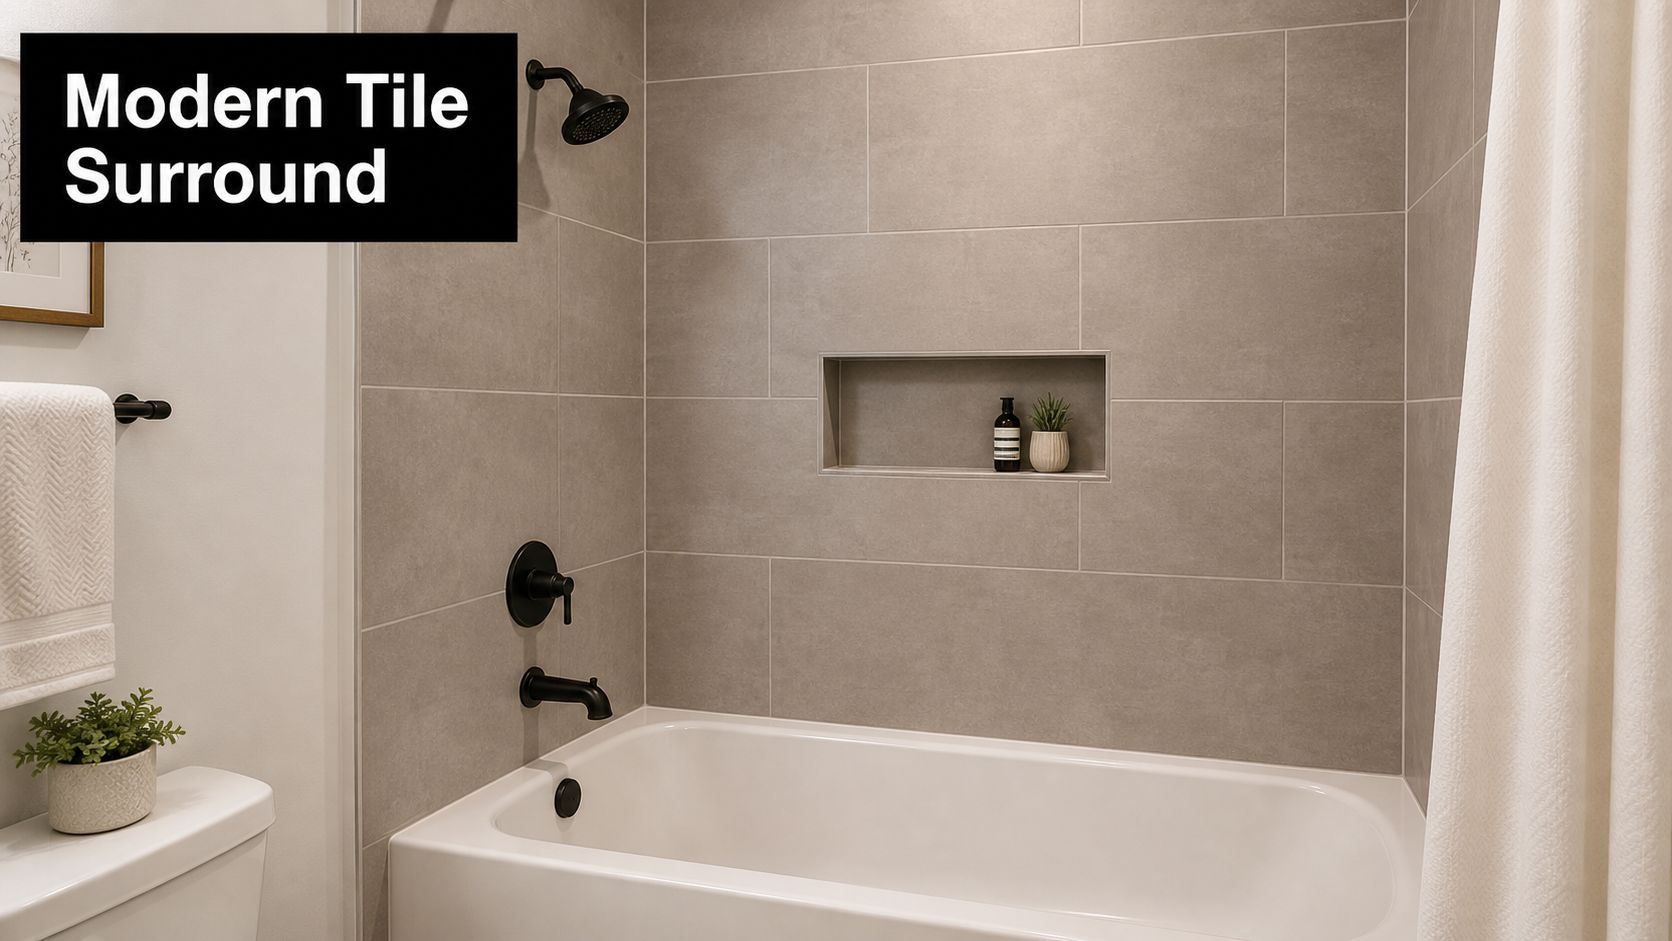
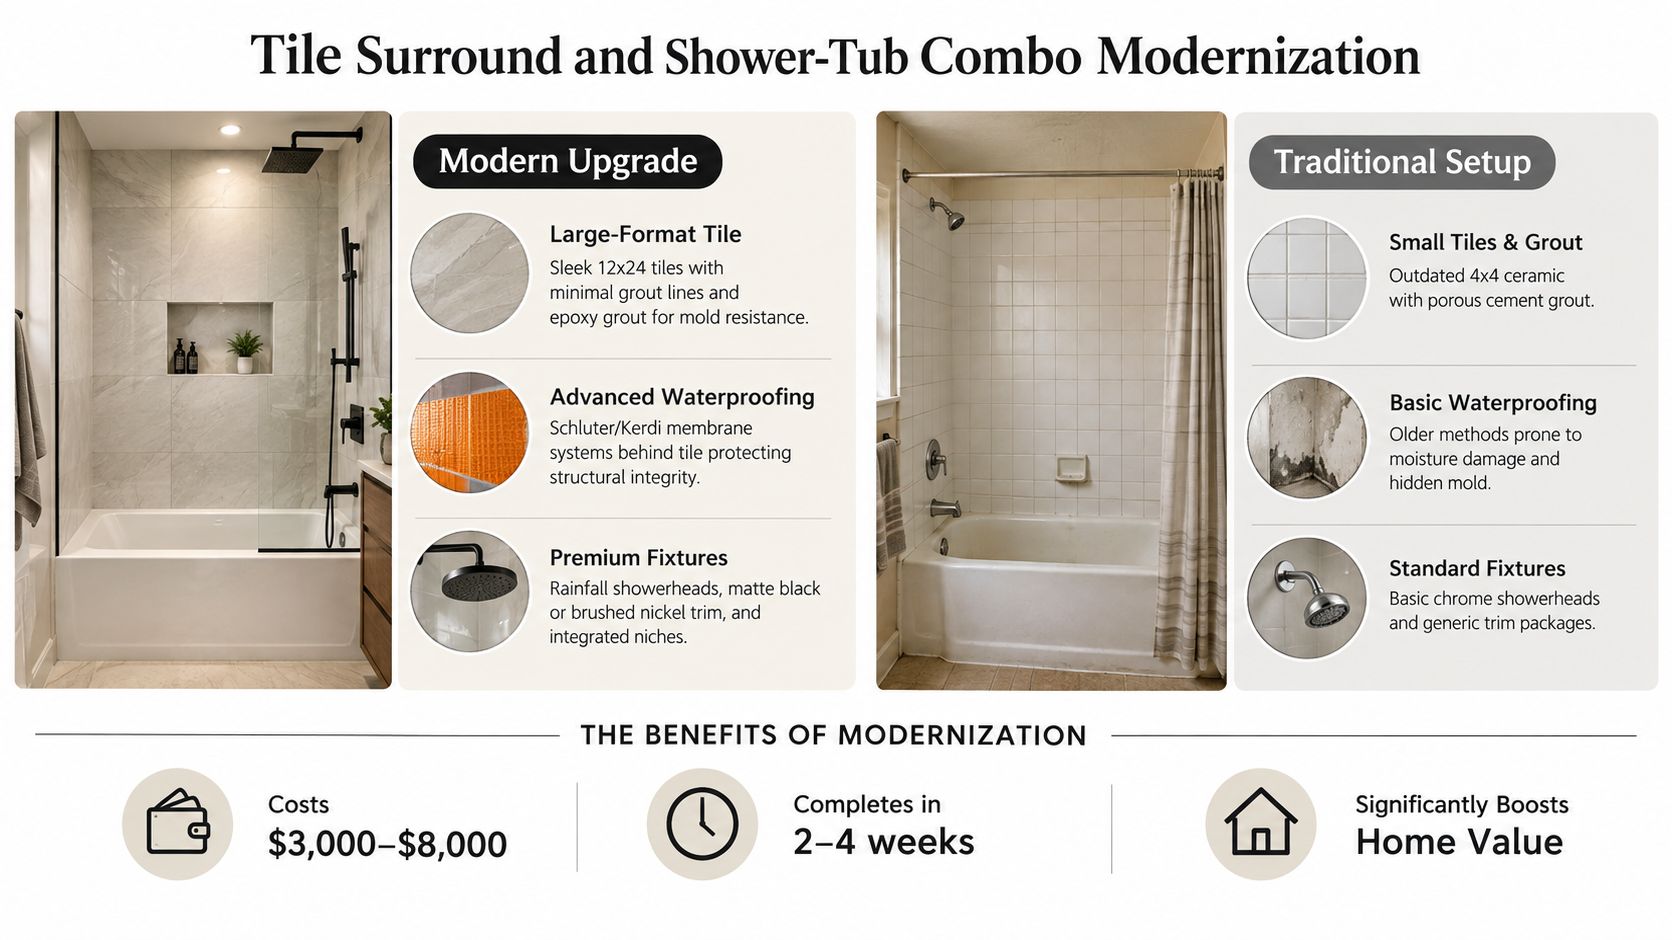
A tub that still fits the household's routine does not need to be removed. Updating its surround can improve water control, storage, lighting, and appearance while keeping one footprint for children, guests, and adults who shower and bathe. The scope still depends on what the walls reveal. Rebuilding waterproofing, changing the valve, or correcting uneven framing can turn a finish update into a larger trade project.
Start with the water-management assembly, not the tile selection. Use a continuous waterproofing membrane behind the tile, such as a Schluter Kerdi system or an equivalent assembly approved for the application. It must tie into corners, penetrations, the tub flange, and the shower threshold. Tile and grout shed surface water, but neither replaces correctly detailed waterproofing.
Layout affects both appearance and labor. Large-format tile reduces grout joints and can make the surround look quieter, though the substrate must be flat enough to support it. Epoxy grout resists staining and can simplify cleaning, but installers need disciplined application because cured residue is difficult to remove. A recessed niche should be framed and waterproofed before tiling. Set its dimensions against the chosen tile so the layout does not end with narrow, awkward cuts.
Style should follow the house as well as the homeowner. Elongated subway tile and restrained contemporary fixtures often suit California mid-century interiors. In Arizona, earth-tone porcelain or stone-look tile can bring desert colors into the wet area without the maintenance demands of porous natural stone. A classic tub profile with modern controls and layered lighting can bridge older and newer finishes.
During rough-in, settle the details that are difficult to change later:
- Ventilation: Provide a properly sized exhaust strategy and route it according to local requirements.
- Lighting: Add task lighting near the mirror and comfortable illumination inside the bathing zone.
- Storage: Frame niches or shelves before backer board installation.
- Fixture testing: Check the shower valve, diverter, handheld spray, and drain before closing walls.
- Cure time: Keep the tub out of service until grout, sealants, and other products have cured according to their manufacturers' instructions. Grout may require 24 hours or more, depending on the product.
A contractor should handle opened walls, plumbing changes, membrane installation, and tile substrate preparation. Homeowners can usually manage finish selection and painting outside the wet area, provided those tasks do not disturb the waterproofed assembly. Plan staging around cure time and inspection access, especially when this is the only full bathroom.
5. Soaker Tub With Custom Deck and Surround
A deep soaker set into a custom deck suits a large primary bath where the tub should function as built-in architecture. The platform can conceal plumbing, support toiletries, create a sitting edge, and anchor the room more firmly than a freestanding fixture. Marble, porcelain slab, natural stone, and quality tile can support different directions, including a California resort look or an Arizona scheme with copper fixtures and warm stone.
Treat the deck as a wet assembly from the first drawing. Water collects at the rim, faucet penetrations, corners, and material joints. The tub manufacturer's specifications control framing clearances, support points, access openings, and rim-sealing methods. Verify those requirements before the carpenter closes the platform. A finished stone surface cannot correct an unsupported tub, an inaccessible pump, or a failed transition between materials.
The best time to resolve coordination problems is before rough framing. Drawings should show the tub, deck height, faucet position, niches, towel storage, lighting, and removable access panels. Order specialty slabs, trim, and fixtures early. A delayed template or custom fitting can keep several trades from finishing, which matters even more if the home has only one full bathroom.
Heated flooring can make the area more comfortable, but the electrical plan must coordinate heating controls with lighting, ventilation, and other bathroom circuits. Moisture control depends on the complete setup, including duct routing, make-up air, and switch location, not only on choosing a fan with a high capacity.
Plan the built-in features around daily use:
- Storage: Ledges and recessed compartments keep bathing supplies within reach.
- Visual weight: The tub reads as part of the room instead of an object placed on the floor.
- Design control: Tile, stone, trim, and lighting can be coordinated as one composition.
- Repair exposure: More joints and assemblies create more opportunities for movement or water intrusion when installation is rushed.
Use a designer or remodeling contractor for layout, framing, waterproofing, electrical coordination, and installation. Homeowner DIY work is generally limited to selecting finishes, hardware, and accessories. Before work begins, set milestones for waterproofing inspections, material deliveries, slab templates, access-panel placement, and tub-fill testing. Keep a temporary bathing plan if the renovation removes the only usable tub or shower.
Budget for a substantial renovation rather than a cosmetic update. The Houzz data cited earlier places major primary-bath remodels in a five-figure spending tier, with costs increasing as homeowners add premium fixtures, tile, waterproofing, and layout changes. A custom deck belongs in that broader project allowance.
6. Barrier-Free Curbless Shower-Tub Conversion
Removing the tub and creating a curbless shower is the clearest choice when the priority is safer entry, open circulation, or future accessibility. The finished floor flows into the shower area, while a carefully formed slope directs water to a linear or point drain. The result can make a compact room feel less segmented, but it requires precise structural and waterproofing work.
This conversion is not merely a matter of taking out the tub and laying tile over the exposed floor. The installer may need to lower or modify the subfloor, coordinate the drain body, establish the correct slope, and integrate the shower waterproofing with the bathroom floor and walls. In a concrete slab home, drain relocation can involve saw-cutting and patching. In a framed floor, joists and subfloor thickness may limit the available assembly.
Design for present and future users
Place grab-bar backing during framing, even if the household doesn't need bars today. A built-in bench can provide seated bathing and a place to rest toiletries, but it must be sloped and waterproofed correctly. Large-format tile or slab-style panels can reduce visual noise, while smaller slip-resistant tile may offer better traction in the sloped area. The surface should be selected for wet-foot use, not just showroom appearance.
An open shower can spread moisture farther into the room, so ventilation and splash control need attention. A partial glass panel, correctly placed showerhead, handheld spray, and adequate floor drainage can limit overspray. Test the drainage before final tile and observe where water travels, especially around the entrance.
The trade-off is resale and household flexibility. A tub removal may improve accessibility and daily comfort, but homeowners should consider whether another tub remains elsewhere in the home. The 2017 Houzz survey on keeping or removing the primary tub found that 37% of renovating homeowners upgraded a bathtub, while 27% removed it entirely. Among those who removed it, 91% did so to create room for a larger shower. That history reinforces the idea that the tub often represents a broader space-planning decision.
A curbless conversion belongs with qualified professionals. Waterproofing, structural modifications, plumbing, tile, glass, and permitting must work together. DIY finish work may be possible after the wet assembly has been professionally completed, but the critical drainage and waterproofing stages shouldn't be improvised.
The following video provides a visual reference for the type of bathroom transformation homeowners may be considering:
7. Vintage or Clawfoot Tub Restoration and Modernization
A clawfoot tub can preserve the character of a Victorian, Craftsman, or historic California home while allowing the rest of the bathroom to perform like a modern space. In an Arizona territorial-style property, a pedestal tub can pair with Spanish tile, bridge faucets, and warm metal details. The strongest results respect the architecture without turning every component into a period replica.
Begin with an inspection, especially when sourcing a used tub. Check for cracks, repairs, unstable feet, damaged enamel, corrosion, and signs that the rim has been altered. Cast iron tubs can be difficult to move and may require careful route planning through doors, stairs, and finished areas. A restoration specialist can determine whether refinishing is appropriate or whether the tub's condition makes restoration uneconomical.
Preserve the character, fix the performance
Bridge faucets and crosshandle controls support the vintage appearance, but modern shower functionality can still be added. A riser-mounted shower, handheld spray, or carefully detailed enclosure can make the tub practical for daily use. Confirm the floor can support the tub and water load, and plan exposed supply and waste piping so it looks intentional rather than like an afterthought.
Refinishing requires surface preparation and controlled application. The tub should remain out of service for the refinisher's specified curing period, and harsh cleaners or abrasive pads can damage the new finish. A restored tub also needs a maintenance routine based on the coating manufacturer's instructions. If the bathroom will be used by children, guests, or people with limited mobility, evaluate the high rim and slippery floor before choosing this path.
Useful coordination points include:
- Architectural fit: Match the tub silhouette and faucet style to the home's existing trim and tile language.
- Plumbing access: Keep shutoffs and service connections reachable.
- Shower protection: Use a properly detailed curtain or enclosure to control spray.
- Floor safety: Add a stable, washable bath mat outside the tub and specify a safer interior surface where possible.
- Restoration timing: Schedule refinishing after dusty demolition but before final accessories and styling.
Professional restoration and plumbing are the sensible choices. DIY can cover paint colors, mirror selection, or removable accessories, but surface preparation, refinishing chemicals, heavy-tub movement, and supply connections carry too much risk for casual experimentation.
8. Double-Vanity Master Bath With Soaking Tub Nook
A soaking tub nook paired with double vanities works for couples who need efficient morning routines and want a separate place to unwind. The tub can sit in a windowed alcove, between the vanity zones, or at the end of a room with a clear sightline. The layout succeeds when it separates wet, grooming, storage, and circulation zones instead of filling the center of the room with expensive fixtures.
Begin with traffic flow. Two vanities need comfortable standing space, door and drawer clearance, usable outlets, and mirror lighting that doesn't cast shadows across the face. A tub placed under a window needs privacy planning, water-resistant trim, and careful attention to solar exposure. In Arizona, window treatments and glass selection can limit heat and glare. In California, the window assembly must be coordinated with moisture protection and the home's architectural style.
Coordinate the room as one system
A dual-vanity layout can expose weaknesses in storage if each person receives only a small drawer stack. Use deep, soft-close drawers for daily items and reserve upper cabinets or a linen closet for less frequently used supplies. Separate lighting controls can accommodate different schedules. Towel warmers and heated floors are comfort upgrades, but they require early electrical coordination rather than late-stage additions.
Hot-water planning still matters even though the vanities themselves don't consume bathing water. A tub that fills while another household member showers can test the limits of the existing system. Confirm fixture flow requirements and water-heater capacity before finalizing the tub model and schedule.
A practical layout review should address:
- Sightlines: Decide whether the tub is meant to be a focal point or visually screened.
- Storage: Assign a home for toiletries, towels, cleaning supplies, and styling tools.
- Lighting: Layer vanity, ceiling, accent, and tub-area lighting instead of relying on one fixture.
- Ventilation: Make sure humid air from the tub and shower reaches effective exhaust paths.
- Maintenance: Avoid hard-to-reach ledges and specify finishes that tolerate frequent cleaning.
This is a broader remodel, not a simple tub swap, when it involves new walls, moved plumbing, multiple electrical circuits, heated elements, or custom cabinetry. A staged plan should protect the remaining areas of the home from dust and water while the bathroom is offline. For help aligning the layout, materials, and construction sequence, homeowners can contact NorCal Construction.
8-Option Tub Remodel Comparison
| Remodel Option | 🔄 Complexity | 💡 Key resources & tips (cost, materials, skill) | ⚡ Timeline | 📊 Expected outcomes & ⭐ | Ideal use cases |
|---|---|---|---|---|---|
| Freestanding Soaking Tub Installation | Medium–High, plumbing & layout rework | $1.5k–$5k+; choice of acrylic/cast iron/stone; reinforce floor, check water heater | 2–4 weeks | Strong aesthetic & resale uplift; relaxing spa feel, ⭐⭐⭐⭐ | Master baths with space; luxury focal-point upgrades |
| Walk-In Tub with Safety Features | High, door, waterproofing, structural support | $3k–$8k+; professional install, reinforced flooring; plan clearance & ADA details | 3–5 weeks | Excellent safety & independence; reduces fall risk, ⭐⭐⭐⭐ | Aging-in-place, mobility-limited homeowners, multigenerational homes |
| Spa-Style Jetted Tub Integration | High, electrical + plumbing complexity | $2.5k–$7k+; dedicated circuits, jet plumbing; plan ventilation & maintenance | 3–6 weeks | High wellness benefits and luxury appeal; therapeutic performance, ⭐⭐⭐⭐ | Wellness-focused master baths; luxury remodels |
| Tile Surround & Shower-Tub Combo Modernization | Medium, demolition + waterproofing | $3k–$8k; large-format tile, Schluter/Kerdi, epoxy grout; expect dust during demo | 2–4 weeks | Strong visual upgrade at moderate cost; improved waterproofing, ⭐⭐⭐ | Budget-conscious aesthetic refreshes; older bathrooms |
| Soaker Tub with Custom Deck & Surround | Very High, framing, custom finishes & waterproofing | $8k–$20k+; premium stone/tile, detailed waterproofing, design services | 6–12 weeks | Very high luxury and resale; dramatic centerpiece, ⭐⭐⭐⭐⭐ | High-end master suites; luxury-focused renovations |
| Barrier-Free Curbless Shower-Tub Conversion | High, sloped floor and specialized drainage | $4k–$10k+; linear drain systems, waterproof sloped framing; test drainage before finish | 3–5 weeks | Excellent accessibility and open aesthetic; improves livability, ⭐⭐⭐⭐ | Aging-in-place, multigenerational homes, modern minimalist designs |
| Vintage / Clawfoot Tub Restoration & Modernization | Medium, specialized restoration & plumbing adaptation | $2k–$8k+; source/restoration specialists, match plumbing with bridge faucets | 3–6 weeks | Distinctive character and historic appeal; sustainable reuse, ⭐⭐⭐ | Historic homes, eclectic/interior-focused homeowners |
| Double-Vanity Master Bath with Soaking Tub Nook | Very High, large-scale reconfiguration | $15k–$35k+; full plumbing/electrical redesign, design/permits, heated floors option | 8–16 weeks | Top-tier luxury, major value increase; highly functional for couples, ⭐⭐⭐⭐⭐ | High-end renovations, couples seeking spa-like primary baths |
Choose the Tub Remodel That Fits Your Future
The best bathroom tub remodel ideas start with the life the room needs to support. If soaking is the priority, compare a freestanding tub, a jetted system, and a deck-mounted soaker based on comfort, hot-water demand, cleaning, service access, and the amount of floor area each option consumes. If safety is the priority, compare a walk-in tub with a curbless shower and ask which arrangement the user can enter, control, clean, and exit confidently.
Style matters, but it shouldn't outrank construction reality. A freestanding tub may create a stronger focal point, while a built-in arrangement can offer useful ledges and easier cleaning. A restored clawfoot tub may preserve the character of an older California home, but its high rim and exposed plumbing may not suit every household. A modern tub-shower combination often preserves flexibility for children and guests, while removing the only tub in the home can narrow future use.
Turn the idea into a workable scope
Confirm the existing drain, supply lines, floor framing, wall conditions, window locations, ventilation path, electrical capacity, and available clearance before selecting fixtures. A tub located several feet away from its current position may require more demolition than expected. A curbless shower may require structural changes to achieve drainage. A jetted tub may require a dedicated circuit and a service panel. A custom deck may add waterproofing transitions, material lead times, and access requirements.
Use the Houzz spending figures as a planning signal, not a quote. The 2024 median primary-bath remodel spend was $13,000, while major remodels of smaller primary bathrooms reached $17,000, larger bathrooms held at $25,000, and the top 10% reached $60,000 in the cited study. Your final cost will depend on room size, plumbing relocation, demolition findings, product selection, labor, permits, structural repairs, and finish complexity.
Before construction, ask the contractor to document:
- Permitting: Which permits and inspections apply in your California or Arizona municipality?
- Waterproofing: What membrane, substrate, transitions, and inspection points will the wet area use?
- Structure: Does the floor need reinforcement for a cast iron, stone, walk-in, or deck-mounted tub?
- Electrical: Are circuits, controls, lighting, ventilation, and heated elements planned before walls close?
- Accessibility: Can the layout accommodate current users and future grab bars, seating, or a conversion?
- Staging: Where will the household bathe during construction, and how will dust, water, and debris be contained?
Demolition can reveal leaking supply lines, damaged subfloor, mold, outdated wiring, uneven framing, or an improperly built shower assembly. A responsible budget includes a contingency for concealed conditions, but it also includes decision points so the homeowner can approve repairs before the work proceeds. Product lead times should be checked before demolition, especially for custom tubs, stone, specialty tile, glass, cabinetry, and restoration services.
DIY has a place, but it should stay within clearly limited cosmetic work. Homeowners can select finishes, compare fixtures, organize accessories, paint suitable dry areas, and complete minor non-plumbing updates when the project allows. Layout changes, waterproofing, structural reinforcement, electrical work, plumbing relocation, walk-in and curbless conversions, heavy-tub handling, and permit coordination belong with qualified professionals.
NorCal Construction serves homeowners across California and Arizona with bathroom remodeling, custom showers and bathtubs, material selection, permitting, and construction management. The team can help coordinate the process from the initial layout and product decisions through demolition, inspections, installation, and final testing. A final walkthrough should test every fixture, drain, shower control, door seal, exhaust fan, light, access panel, and finish before the bathroom returns to daily use.
If you're ready to replace an outdated tub or rethink the entire wet area, start by documenting the current room, identifying your household's priorities, and collecting the fixture and finish ideas that fit your home. Then bring those details to a remodeling partner who can evaluate the structure, plumbing, waterproofing, code requirements, and construction sequence before you commit to a design.
NorCal Construction helps California and Arizona homeowners plan and build bathroom tub remodels, custom showers, accessible wet areas, tile surrounds, vanities, and broader bathroom renovations. Visit NorCal Construction to discuss your layout, material selections, permitting needs, and construction plan with a team that can coordinate the project from concept through completion.