
Only 1 in 10 U.S. homes is considered “aging ready,” meaning it has a step-free entrance, a first-floor bedroom and full bathroom, plus at least one bathroom accessibility feature such as handrails or a built-in shower seat, according to a Census-based summary of aging-in-place needs. That gap becomes painfully practical when someone slips while stepping out of a tub, struggles to rise from a low toilet, or needs a caregiver to maneuver around a vanity.
Bathroom renovations for elderly homeowners should address more than appearance. The right remodel supports safer transfers, clearer movement, easier bathing, and continued independence. It also gives a family member or professional caregiver enough room to help without forcing the older adult into an awkward or undignified routine.
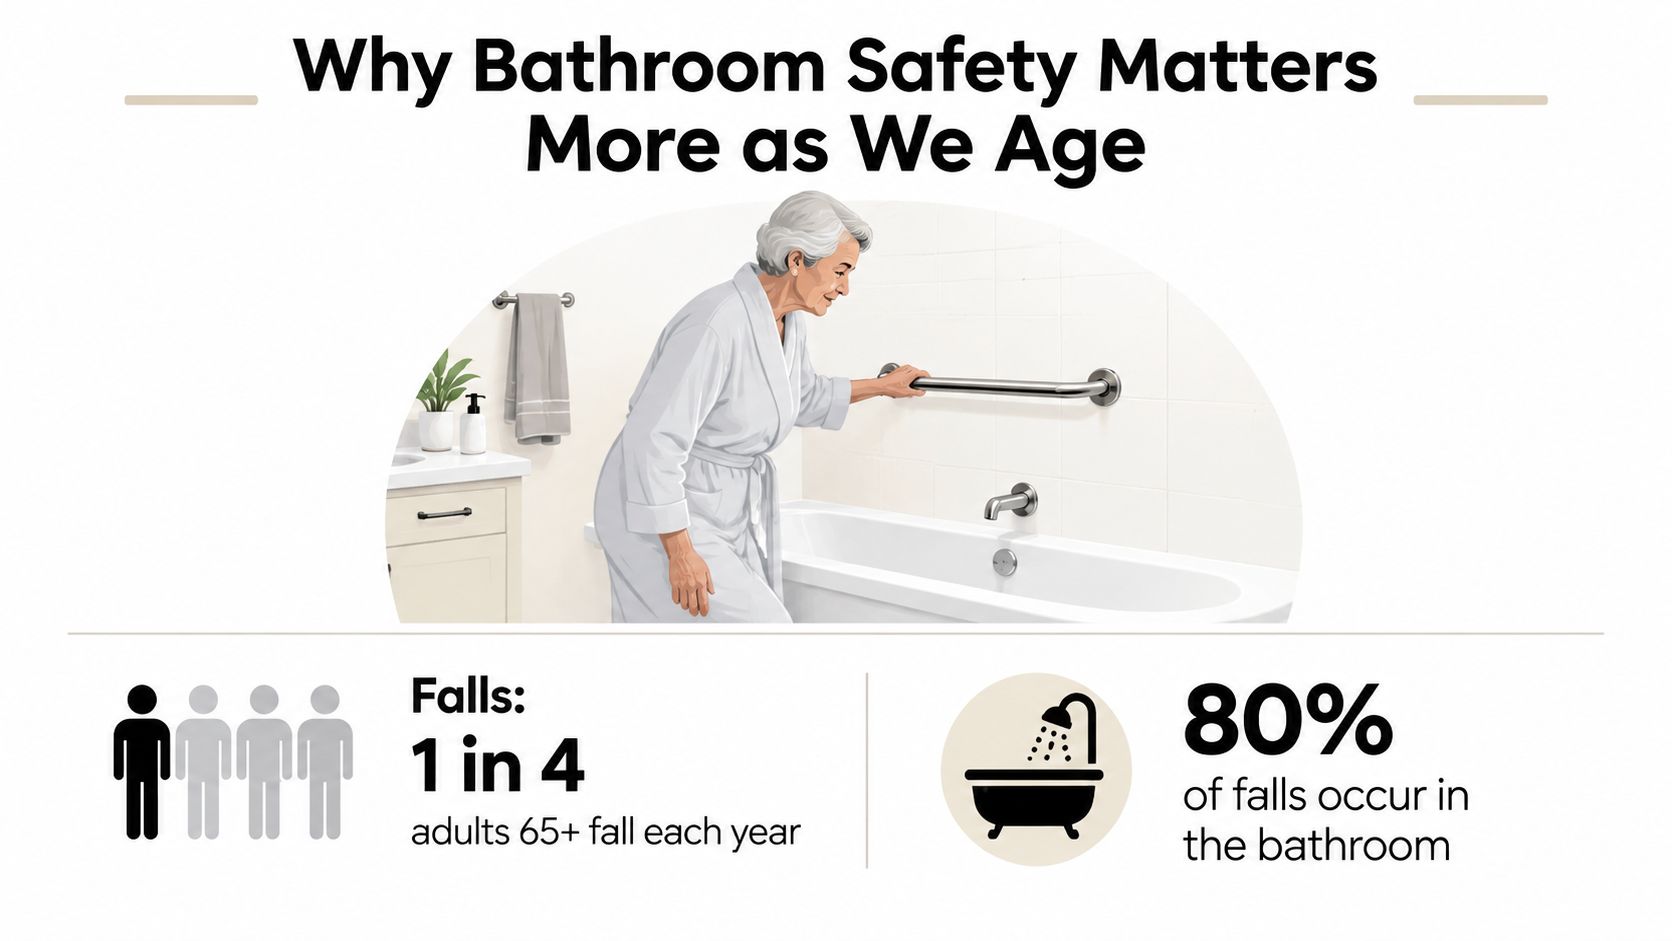
Why Bathroom Safety Matters More as We Age
A bathroom can become difficult long before a homeowner considers themselves disabled. A small change in balance may turn a wet tile floor into a serious obstacle. Reduced leg strength can make a standard toilet feel unreasonably low. A tub wall that once seemed routine can become the most hazardous step in the house.
The broader housing problem is substantial. The aging-in-place research summary notes that nearly 11 million older Americans have serious difficulty walking or climbing stairs, while almost 4 million have difficulty bathing or dressing themselves. The same source reports that more than half of bathroom injuries are associated with shower use or getting into and out of a bathtub. Those facts explain why a senior bathroom remodel should start with movement and transfers, not tile color.
A cosmetic remodel won't solve a movement problem
Replacing a dated vanity may make the room look newer, but it won't help someone who can't step over the tub safely. A decorative wall-mounted bar installed without proper reinforcement may look appropriate but fail when someone puts their full weight on it. A loose bath mat can add color while introducing another tripping hazard.
A successful bathroom renovation for an elderly homeowner considers the entire sequence of use:
- Approach: Can the person enter with a cane, walker, or wheelchair without catching the door or squeezing past the vanity?
- Transfer: Is there a stable place to hold while sitting, standing, or moving into the shower?
- Bathing: Can the user control water, reach the handheld shower, and sit if fatigue or balance becomes an issue?
- Exit: Does the person have support before stepping onto the bathroom floor?
- Assistance: Can a caregiver stand beside the shower or toilet without blocking the only exit?
That sequence matters because older adults often don't fall in the center of the room. They lose balance during transitions, such as turning, stepping over a threshold, lowering onto a toilet, or reaching for a towel.
Practical rule: Design for the hardest likely day, not the easiest current routine.
Independence and assistance must coexist
Many homeowners initially ask for a grab bar or a walk-in shower. Those can be useful, but the more important question is whether the room still works when a walker, wheelchair, or caregiver enters the picture. A shower that feels spacious when used alone may become restrictive when someone needs help washing, dressing, or transferring.
The best result feels ordinary rather than institutional. A curbless shower can use large-format porcelain, a recessed niche can replace a plastic caddy, and blocking for future grab bars can disappear behind finished walls. Safety should be built into the room's structure so the homeowner gains support without sacrificing comfort or visual appeal.
A nationally representative study of 2,614 adults aged 65 and older found that 42% of older adults with diminished ability to bathe or toilet independently lacked essential equipment, including grab bars or seats. The study estimated that this represented about 5 million people in the United States, as reported in the peer-reviewed analysis of bathroom equipment access. The lesson for remodeling is direct: a bathroom can appear finished while still failing at the tasks that matter most.
Assessing Mobility Needs and Your Current Bathroom Layout
Start with the person, not the floor plan. An accessible bathroom for an older adult who walks independently but tires easily will differ from one used by someone with a rolling walker, wheelchair, or daily caregiver support.
Observe a normal routine without correcting it. Watch how the user enters, turns, reaches for the toilet paper, sits down, stands up, steps into the tub, and dries off. Note where they pause, touch the wall, twist their torso, or ask for help. Those observations reveal more than a product list.
Build a needs profile before choosing fixtures
Write down the current situation and likely changes. A practical worksheet can include:
- Mobility aids: Record whether the user relies on a cane, standard walker, rolling walker, wheelchair, or transfer bench. Measure the actual device, including its widest points.
- Balance and endurance: Note whether standing for a shower is comfortable, whether turning causes instability, and whether the user becomes tired before dressing.
- Vision: Look for difficulty distinguishing the shower floor from the wall, reading faucet markings, or locating the toilet at night.
- Hand strength: Test whether the user can operate round knobs, pull a heavy shower door, or squeeze a handheld sprayer.
- Caregiver role: Identify whether help is occasional, daily, or likely to increase. The caregiver's standing position should influence the layout.
- Future equipment: Consider whether a shower chair, transfer bench, commode, or wheelchair may be needed later.
Ask the user's physician, occupational therapist, or physical therapist about transfer limitations, weight-bearing restrictions, and balance concerns. A contractor can build the room, but medical professionals can clarify what movements are safe and what assistance may be required.
The bathroom remodeling portfolio can help homeowners compare how different layouts handle circulation, storage, and fixture placement before committing to a design direction.
Map the room in use
Measure the clear opening of the bathroom door, not just the door slab. A neutral accessibility guide cited in the 2025 Houzz Bathroom Trends Study emphasizes a 32-inch minimum doorway clearance, a 60-inch turning radius, and 27-inch knee clearance as useful planning references. These figures should be reviewed with the designer, contractor, and local authority because residential conditions and local requirements can vary.
Sketch the path from the doorway to each fixture. Mark the space occupied by a walker, the swing of the door, and the location of towel bars, hampers, and storage baskets. A door that swings inward may trap a fallen person or consume the only clear floor area. An outward swing, pocket door, or carefully selected hinged door can improve access, but each option has hardware, framing, privacy, and code implications.
Check the toilet approach from the side and front. A comfort-height fixture may ease sitting and standing, yet it still needs enough surrounding room for a transfer. Measure the vanity's underside. A cabinet that extends across the floor may leave no place for a wheelchair or caregiver's feet.
Separate essential work from later upgrades
Create two lists before requesting bids:
Must-have work protects against immediate risks, such as a stable bathing solution, proper waterproofing, secure support points, reliable lighting, and a clear route.
Nice-to-have work improves comfort or appearance, such as heated floors, decorative lighting, upgraded mirrors, or premium hardware.
This distinction keeps the project focused when the existing room can't accommodate every feature. It also prevents a common failure, spending the available budget on finishes while leaving the doorway, shower entry, and transfer zones unchanged.
Accessible Design Features That Improve Safety and Comfort
Accessible design works best as a coordinated system. A grab bar can't compensate for a cramped toilet approach, and nonslip tile can't solve an unsafe tub threshold. Each feature should support a specific movement, from entering the room to drying off.
A curbless shower is often the strongest starting point when the floor structure allows it. Removing the raised threshold reduces a trip point and can make wheelchair or walker access practical. The trade-off is substantial waterproofing and drainage work. The shower floor needs the correct slope, the drain must handle the layout, and the surrounding structure must be protected from moisture.
A low-profile threshold may work well where a fully recessed shower isn't feasible. It can reduce construction complexity, but it still requires a deliberate step. For someone with limited balance, the difference between “low” and “zero” matters.
Match bathing equipment to the user
A built-in or folding shower seat is more stable than a loose stool when properly anchored. Fixed seating creates a dependable transfer location and can make bathing less tiring. Folding seats preserve open floor area when the shower serves users with different needs.
A handheld shower on a slide bar lets the user control the spray while seated. Place the controls where they can be reached before entering the water, rather than forcing someone to step into a wet space to adjust temperature. A thermostatic or pressure-balancing valve can help manage temperature changes, but the specific valve and installation still need to comply with local plumbing requirements.
Grab bars should be anchored to structural blocking or another approved support system. Installing them into finished tile without planning for reinforcement is one of the most common mistakes in aging-in-place work. If the homeowner doesn't need every bar today, reinforce likely locations before closing the walls.
Use clearance as a safety feature
A caregiver needs more than a narrow standing strip beside the shower. They may need to turn, steady the bather, move a leg over a threshold, or position a transfer bench. The same applies beside the toilet. A room can contain every recommended fixture and still fail because the clear floor area disappears between them.
The table below compares common features by their practical role.
| Feature | Best For | Key Benefit | Space Consideration |
|---|---|---|---|
| Curbless shower | Wheelchair users, walkers, and users with poor balance | Removes a raised entry point and supports smoother access | Requires careful floor recessing, drainage, and waterproofing |
| Low-profile shower threshold | Remodels where a full recess isn't practical | Reduces the height of the step | Still creates a transition that some users may struggle with |
| Fixed or folding seat | Users who fatigue while standing or need caregiver assistance | Provides a stable seated bathing position | Fixed seats consume space, while folding seats need wall clearance |
| Handheld shower on a slide bar | Seated users and caregivers | Keeps the spray within reach and improves control | Place it where hose length won't create a trip or snag hazard |
| Wall-reinforced grab bars | Transfers at the shower and toilet | Offers dependable support during weight shifts | Blocking must be planned before tile and wall finishes |
| Comfort-height toilet | Users with reduced leg strength or joint pain | Makes sitting and standing feel closer to a chair transfer | Confirm approach and side clearance before selecting the bowl |
| Textured, slip-resistant flooring | Wet rooms and shower approaches | Improves traction under wet conditions | Very aggressive textures can be uncomfortable and harder to clean |
| Lever handles | Users with limited grip strength | Allows operation with a palm, wrist, or closed hand | Coordinate finish and projection with circulation paths |
| Layered lighting | Users with reduced vision or nighttime needs | Improves contrast and reduces dark transition zones | Avoid glare and place switches where they can be reached before entry |
Small bathrooms need sharper priorities
In a compact bath, don't automatically install every product. Remove the tub if the user doesn't need it, select a shower configuration that preserves a clear approach, and use recessed storage instead of projecting shelves. A pocket door can help, but the wall must be suitable for the pocket assembly and the hardware must remain easy to operate.
In a larger bathroom, resist filling open space with unnecessary cabinetry. Preserve a turning zone and a caregiver position. A couple may also need different solutions, such as an open shower for one user and a handheld fixture with a seat for the other.
For design and construction coordination, homeowners can review available bathroom remodeling services, then ask any contractor to explain how the proposed layout handles an actual walker, wheelchair, and helper.
Choosing Fixtures Materials and Meeting CA and AZ Code Requirements
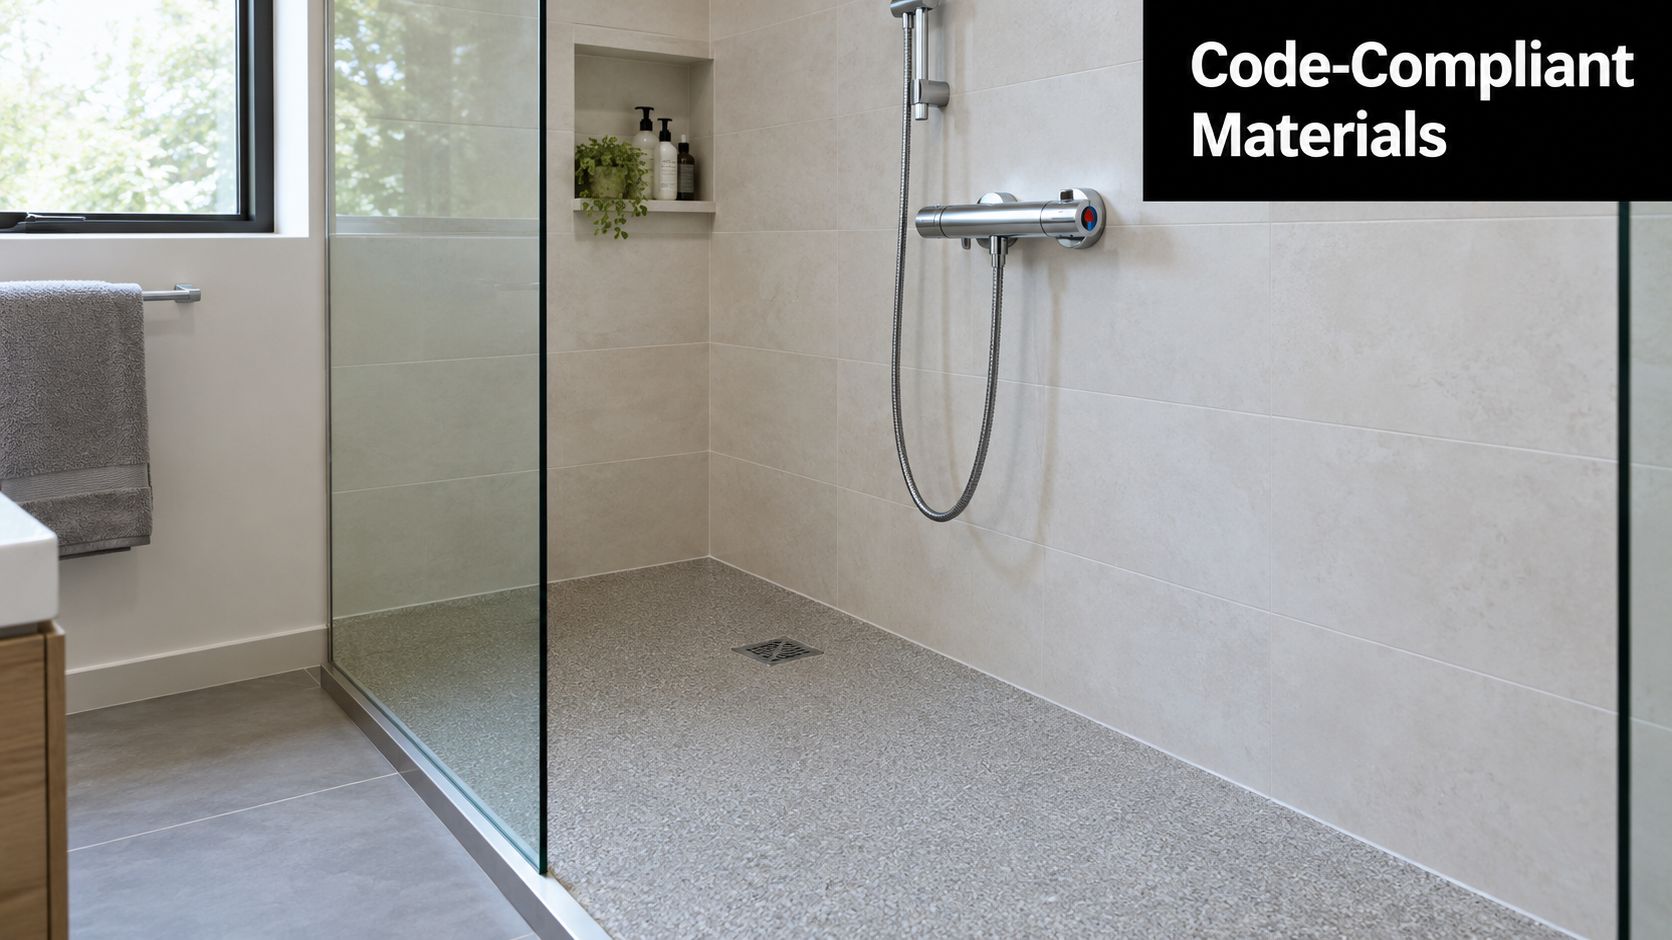
Material selection should begin with wet performance, cleanability, and maintenance. Style comes after those decisions, not before them. A polished bathroom can still feel warm and residential when the safety components share a finish and the layout avoids visual clutter.
Select surfaces for wet use
Choose floor tile with a finish that provides traction when wet, and ask the installer how the selected product performs in the shower and on the main floor. Glossy surfaces may look spacious but can create glare and become difficult to trust under wet feet. Very rough surfaces can collect residue and challenge a homeowner who handles cleaning alone.
Porcelain is often practical for floors and walls because it offers durability and many visual options. Large panels or large-format tile can reduce grout maintenance, but the installer must still create a properly sloped shower floor. Smaller shower-floor tile can make slope transitions easier, though it creates more grout joints.
For walls, use a complete waterproofing system rather than relying on tile and grout as the water barrier. Niches need proper flashing and slope so bottles don't sit in standing water. Sealant joints at changes of plane should be inspected and maintained.
A floating or wall-hung sink can provide knee clearance for some users, but it needs careful support and thoughtful placement of plumbing. A vanity offers storage and concealment, but a deep cabinet can block a wheelchair or caregiver. Comfort-height toilets, bidet seats, lever faucets, and easy-to-read controls can improve daily use, provided the surrounding clearances remain usable.
The video below offers a visual reference for accessible shower planning and installation considerations.
Treat permits as part of the design
California and Arizona both apply state and local construction requirements, but the permit path depends on the city, county, scope, property, and existing conditions. Moving plumbing, modifying electrical circuits, changing ventilation, altering framing, or rebuilding a shower assembly can trigger permit and inspection requirements. A cosmetic replacement of finishes may be treated differently, but homeowners shouldn't assume a project is exempt.
Ask the contractor to identify the responsible jurisdiction and provide a written permit scope. The plan should address plumbing rough-in, electrical work, ventilation, structural reinforcement, waterproofing, and final inspections where applicable. ADA standards can provide useful design guidance, but a private residence may be governed by different rules than a public or commercial facility. Use accessibility dimensions as planning references, then confirm the enforceable requirements with the local building department.
A reliable contractor should explain who pulls the permit, who schedules inspections, and what happens if an inspector requests a change. Avoid a bid that treats waterproofing as an invisible allowance. The membrane, pan, drain connection, wall reinforcement, and inspection sequence are the parts that determine whether the shower remains sound.
Budgeting Timelines and Choosing the Right Contractor
A senior-focused bathroom remodel costs more when it changes the room's underlying function rather than replacing finishes. The major cost drivers usually include demolition, plumbing relocation, electrical changes, structural reinforcement, waterproofing, drainage, specialized fixtures, tile installation, cabinetry, ventilation, and permitting.
Curbless showers deserve particular scrutiny. They may require lowering the framed floor, adjusting a drain, rebuilding the shower base, or coordinating with structural members. If the existing structure can't accept the desired slope, the contractor may need a different drain arrangement or a carefully designed transition. A low-profile system can be a practical compromise, but the bid should state exactly what level of access it provides.
Compare bids by scope, not by headline price
Request an itemized proposal that separates labor, fixtures, materials, demolition, disposal, permit handling, and finish allowances. The cheapest bid may omit blocking, waterproofing details, substrate repair, or the work required to bring plumbing and electrical installations to current standards.
Ask each bidder the same questions:
- Waterproofing: What system will protect the shower walls and floor, and where will it be used?
- Reinforcement: Which walls will receive blocking for grab bars, seats, and future equipment?
- Drainage: How will the shower slope and drain location work with the existing structure?
- Access: What temporary bathroom arrangements will the household need during construction?
- Allowances: Which fixtures and finishes are included, and what happens if selections exceed the allowance?
- Change orders: How are concealed conditions documented, priced, and approved?
- Inspection: Who handles permits, inspections, corrections, and closeout documents?
Financing may come from savings, a home-equity product, a renovation loan, or assistance programs, depending on the homeowner's circumstances and eligibility. Treat financing as a separate decision from contractor selection. A payment plan doesn't make an incomplete scope more reliable.
Plan the sequence around daily life
The project normally moves through design, field verification, selections, permitting, demolition, rough plumbing and electrical, framing reinforcement, waterproofing, tile or wall finishing, fixture installation, trim, testing, and cleanup. The exact duration varies with the room, permit process, material availability, and concealed conditions. Don't schedule the household around a generic promise without confirming the construction sequence.
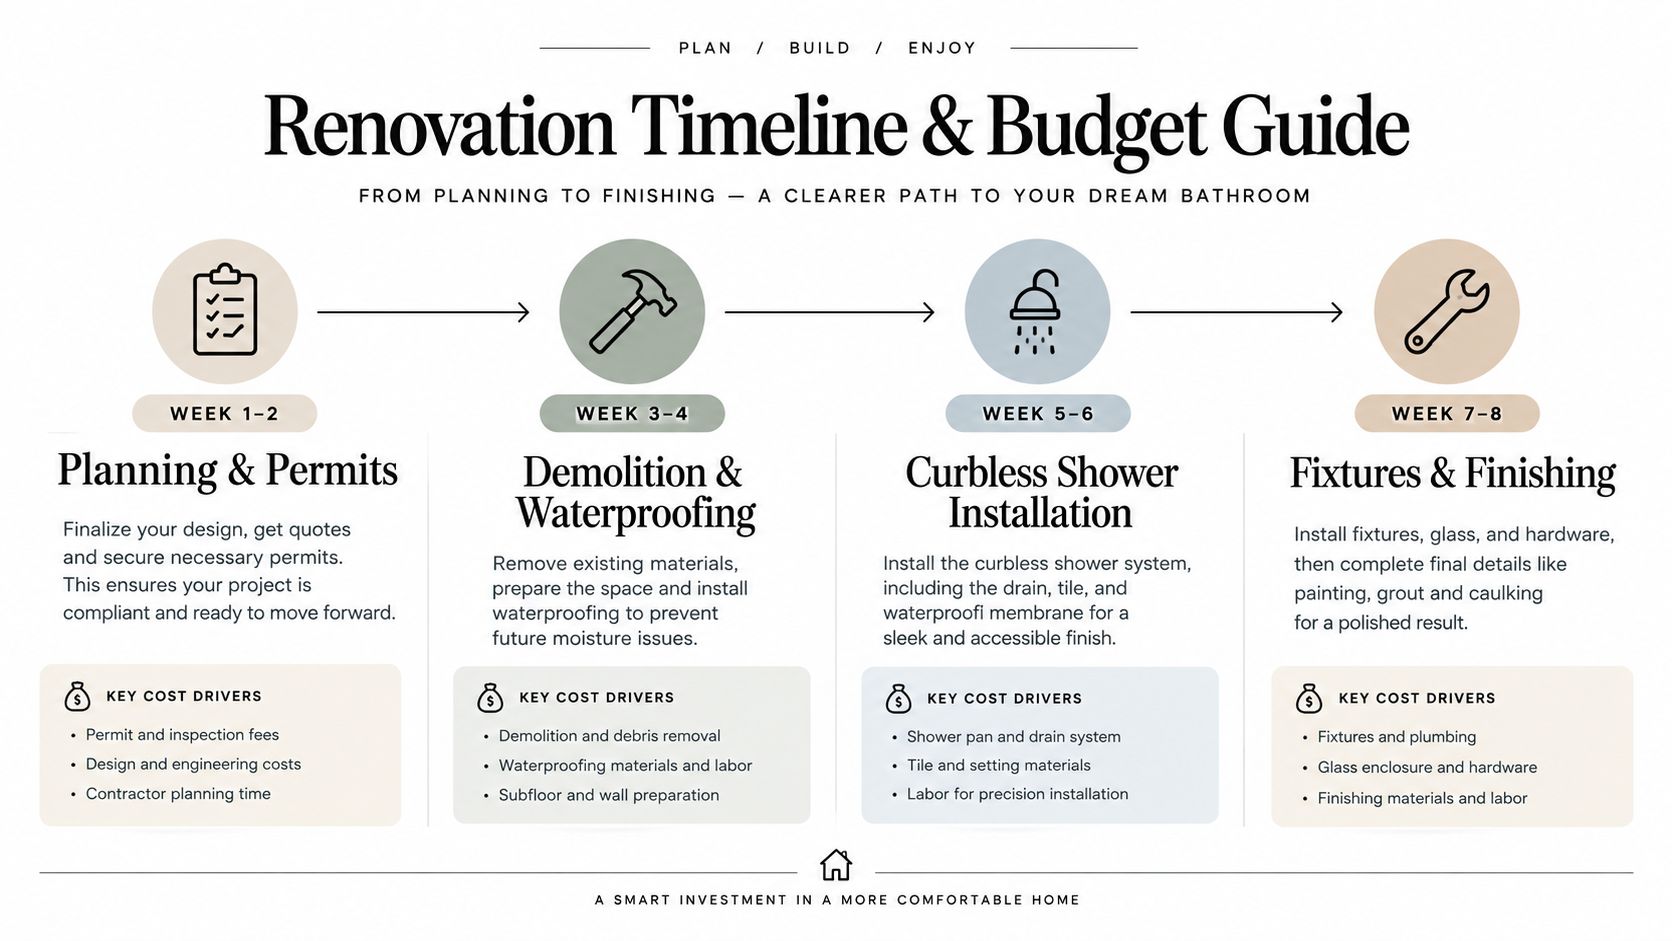
Before demolition, establish where bathing, toileting, medication storage, and laundry will occur. Protect walking paths, control dust, and keep tools and cords away from the older adult's route. A temporary toilet may not solve the problem if the homeowner can't safely reach it, so the contractor and family should agree on a realistic access plan before work starts.
Vet the contractor like a safety professional
Verify the contractor's license with the relevant state licensing authority and confirm that the legal entity on the license matches the contract. Ask for proof of insurance, experience with occupied homes, and references from projects involving aging-in-place features. A general bathroom portfolio isn't enough. Look for evidence of shower waterproofing, reinforced walls, accessible entries, and careful finish work.
Visit a completed project if possible. Inspect how the grab bars are mounted, whether the shower floor drains without puddling, and whether the door and vanity leave usable circulation space. Ask past clients how the contractor handled changes, inspection questions, cleanup, and communication.
A contractor should be willing to discuss failed approaches. If they dismiss caregiver clearance, call grab bars “just accessories,” or promise that tile alone waterproofs a shower, keep interviewing. Homeowners can use the construction consultation contact page to request a project conversation and prepare specific questions about scope and permitting.
Final Safety Checks and Long Term Maintenance for Peace of Mind
Construction is finished only after the room works under real conditions. Conduct the final walkthrough with the person who will use the bathroom, plus a caregiver or family member if assistance is part of the routine. Test the room slowly, with the actual walker, wheelchair, shower seat, toiletries, and towels.
Check each transition and transfer point:
- Entry and door: Confirm that the user can enter, turn, and exit without catching the frame or hardware.
- Shower floor: Walk across it when wet and verify that water drains without creating a persistent puddle.
- Support points: Pull firmly on every grab bar and seat. They should feel rigid, with no movement at the wall or fasteners.
- Controls: Operate faucets, valves, lights, exhaust fans, and switches with the user's actual hand strength and reach.
- Toilet: Test sitting, standing, clothing management, and caregiver positioning.
- Lighting: Check the route at night, look for glare on tile and mirrors, and confirm that controls are easy to locate.
- Storage: Place daily items within comfortable reach so the user doesn't climb, stretch, or bend unnecessarily.
A safe bathroom is one that remains predictable when the user is tired, wet, hurried, or receiving help.
Maintenance protects the investment. Clean floors with products that don't leave a slick residue, and follow the tile and manufacturer care instructions. Inspect caulk and grout at wet-area joints, especially around the shower corners, bench, niche, and door. Replace failed sealant before moisture reaches the structure.
Test the water temperature and plumbing fixtures periodically. Check that the handheld hose hasn't developed a leak, the shower seat hardware remains tight, and lighting continues to provide even visibility. Keep the floor free of laundry, bottles, and loose mats.
Needs can change after surgery, a new diagnosis, or a decline in balance. Reassess the room when the user's mobility aid changes or a caregiver begins providing more physical support. A future adjustment may involve a new seat, additional reinforcement, revised storage, or a door change. Planning for those possibilities during the original renovation makes later work less disruptive.
NorCal Construction helps California and Arizona homeowners plan and build aging-in-place bathrooms with accessible layouts, durable materials, permitting support, and careful construction management. Visit NorCal Construction to discuss your bathroom's current challenges, review practical renovation options, and request a project consultation.