
Thinking about a whole home renovation? It's a huge undertaking, one that completely reshapes your living space. We're not just talking about a fresh coat of paint; this is about gutting rooms, moving walls, updating ancient plumbing and electrical systems, and rethinking your home's entire layout. It's a massive investment, but it’s also an investment in your lifestyle and your property's future value.
Consider this guide your personal roadmap. It’s designed to take a process that feels overwhelming and break it down into a clear, step-by-step plan you can actually follow.
What to Expect in This Whole Home Renovation Guide
Starting a complete remodel is one of the most exciting—and nerve-wracking—projects you can take on as a homeowner. It's your chance to craft a space that truly works for you and your family, from the flow of the kitchen to the location of the laundry room. This is about more than just construction; it's about creating a home that supports your life, not one you have to work around.
Think of this guide as your project kickoff. We’ll walk through the entire journey, phase by phase, from the first "what if" conversation to the final, triumphant walkthrough. My goal here is to give you the insider knowledge you need to make smart, confident decisions every step of the way.
Why Now Is a Great Time to Remodel
If you've been on the fence, the current market makes a strong argument for renovating. So many homes in California and Arizona are getting on in years, and they simply weren't built for the way we live today. A whole home renovation is your opportunity to fix all those little (and big) frustrations, bringing your house up to modern standards of efficiency, safety, and style. Often, it makes a lot more sense financially than trying to find a new house that checks all the boxes.
The numbers back this up. The U.S. home remodeling market is booming, jumping 26.6% between 2021 and 2022 to an incredible $515 billion. And it’s not slowing down. This sustained growth makes investing in your current property a solid and rewarding move. If you're curious, you can dig into these home remodeling statistics to get the full picture.
A large-scale remodel is a partnership. The success of your project hinges on assembling a team of trusted professionals, including architects, designers, and a general contractor who understands your vision and can execute it flawlessly.
Mapping Out Your Journey
To get through a whole home renovation without losing your mind, you need to understand the path ahead. This guide is built to walk you through every critical stage, making sure no detail gets missed. We'll cover everything you need to know to feel in control of the process.
To give you an idea of the project's arc, let's look at the key phases you'll be navigating.
Whole Home Renovation At a Glance
| Phase | Key Objective | Typical Duration |
|---|---|---|
| 1. Planning & Design | Define scope, set a budget, hire a team, and finalize architectural plans. | 1 – 4 months |
| 2. Permitting | Submit plans to local authorities and secure all necessary building permits. | 1 – 6+ months |
| 3. Construction | Demolition, structural work, systems (HVAC, plumbing, electrical), finishes. | 6 – 12+ months |
| 4. Final Touches | Final inspections, punch list completion, and project close-out. | 2 – 4 weeks |
This table provides a bird's-eye view, but we're about to dive deep into what each of these stages really entails.
Here’s a glimpse of what we'll explore together:
- Defining Your Vision and Budget: We’ll start by aligning your dream home with a realistic financial plan.
- Navigating Permits and Timelines: You'll learn the ins and outs of the administrative hurdles, with a special focus on CA and AZ requirements.
- Assembling Your Professional Team: I’ll give you tips on how to find and vet the right contractors and designers to bring your vision to life.
- Selecting Materials and Finishes: We'll talk about making smart choices that balance aesthetics, durability, and cost.
- Living Through Construction: You'll get practical advice for managing daily life while your home is a construction zone.
By the time you're done with this guide, you’ll have a complete roadmap for turning your current house into the home you've always wanted.
Nailing Down Your Renovation Budget and Scope
Let's be honest: every great home renovation starts with a good spreadsheet, not a sledgehammer. The success of your entire project really boils down to two things that work hand-in-hand: a crystal-clear scope and a budget that’s grounded in reality. If you get these two pieces right from the get-go, you'll save yourself from the headaches of scope creep, surprise costs, and a whole lot of stress later on.
Think of this early planning stage as drawing the map for your investment. It’s where you take all those design dreams floating around in your head and translate them into a concrete, practical plan that actually fits your finances. Without this solid foundation, even the most beautiful vision can turn into a nightmare.
The All-Important "Needs vs. Wants" List
First things first: you need to have a brutally honest conversation with yourself (and your partner, if you have one) about your needs versus your wants. This simple exercise is the key to figuring out where to spend your money wisely. A "need" is something you absolutely have to fix for your home to function better, while a "want" is a cherry-on-top feature you'd love to have but could live without.
For example, needing to tear down a wall to open up a cramped, dark kitchen is a functional need. Wanting a specific type of imported Italian marble for the countertops, on the other hand, is a stylistic want. One solves a daily frustration; the other is about aesthetics.
To get clear on your own project, grab a piece of paper and try this:
- List Your Needs: What are the real problems you’re trying to solve? Think about nagging structural issues, ancient plumbing or electrical systems, safety hazards, or a layout that just drives you crazy every day.
- List Your Wants: Now for the fun part. What would make you fall in love with your home all over again? This is where you put things like that spa-like primary bathroom, a pro-grade six-burner range, or custom-built bookcases.
- Rank Everything: Go through both lists and rank each item by importance. This becomes your cheat sheet for making smart trade-offs when the budget gets tight.
This little list will become your North Star, guiding you when you have to choose between upgrading the ancient HVAC system (a definite need) and splurging on those designer light fixtures you saw on Instagram (a want).
Getting Real About Renovation Costs in CA & AZ
Budgeting for a major renovation means you have to get familiar with local costs, and there’s no sugarcoating it—California and Arizona are expensive places to build. As a general rule of thumb, homeowners here can expect to spend anywhere from $100 to over $250 per square foot. That's a huge range, and where your project falls depends entirely on how deep you're going.
A project that involves moving walls, rerouting plumbing, and overhauling the electrical system is always going to land on the higher end of that scale. In contrast, if your reno is more about cosmetic upgrades—new floors, fresh paint, modern fixtures—you'll be closer to the lower end.
Here's a hard truth many homeowners miss: the "invisible" stuff is expensive. It’s not uncommon for 50-60% of your total budget to go toward things you’ll never see, like structural work, foundation fixes, and updated HVAC, plumbing, and electrical systems. They aren't glamorous, but they're what makes a home safe and comfortable.
Your Best Friend: The Contingency Fund
I can't stress this enough: no matter how perfectly you plan, there will be surprises. That's just the nature of tearing down walls. This is where a contingency fund goes from being a nice idea to an absolute necessity. Don't think of it as an "if you need it" fund; it's a "when you need it" fund.
Ask any seasoned contractor, and they'll tell you the same thing: setting aside an extra 15-20% of your total project cost is non-negotiable. This is your safety net for when a plumber discovers hidden water damage, your electrician says the old panel needs a mandatory upgrade to meet code, or a key material gets stuck in a supply chain jam. Without that cushion, a small hiccup can throw your entire project off the rails.
How to Pay for It All: Your Financing Options
For most people, a whole-home renovation is a massive investment that requires more than what's sitting in a savings account. The good news is there are several well-worn paths to financing your project, and each has its own pros and cons.
- Home Equity Line of Credit (HELOC): Think of this as a credit card that uses your home's equity as the limit. It’s a revolving line of credit, so you can draw money as you need it to pay contractors. This flexibility is perfect for the unpredictable payment schedule of a big renovation.
- Home Equity Loan: If you prefer predictability, this might be your best bet. You get a single lump-sum payment with a fixed interest rate, so your monthly payments will never change. This works well when you have a firm, all-in quote from your builder.
- Cash-Out Refinance: With this option, you replace your current mortgage with a new, bigger one and pocket the difference in cash. It can be a fantastic move if you're able to lock in a lower interest rate than you have now, letting you fund the reno and save on your mortgage at the same time.
Before you make any decisions, it’s a great idea to chat with a financial advisor. They can help you figure out which route makes the most sense for your financial health and long-term goals. Once you have a solid scope, a detailed budget, and a smart financing plan, you're ready to start the exciting part.
Navigating Your Renovation Timeline, Permits, and Local Codes
A whole-home renovation is a lot like conducting an orchestra. For everything to come together beautifully, every player—from the plumber to the painter—needs to hit their cues at exactly the right time. Get the sequence wrong, and you've got chaos and costly delays.
Think about it: you can't lay down those gorgeous new hardwood floors while drywall dust is still flying. And you definitely can't close up the walls until a city inspector has given the new electrical wiring a thumbs-up. Each step logically builds on the one before it, creating a natural progression from demolition day to that final, satisfying coat of paint. Sticking to this order is the secret to keeping your project on track and on budget.
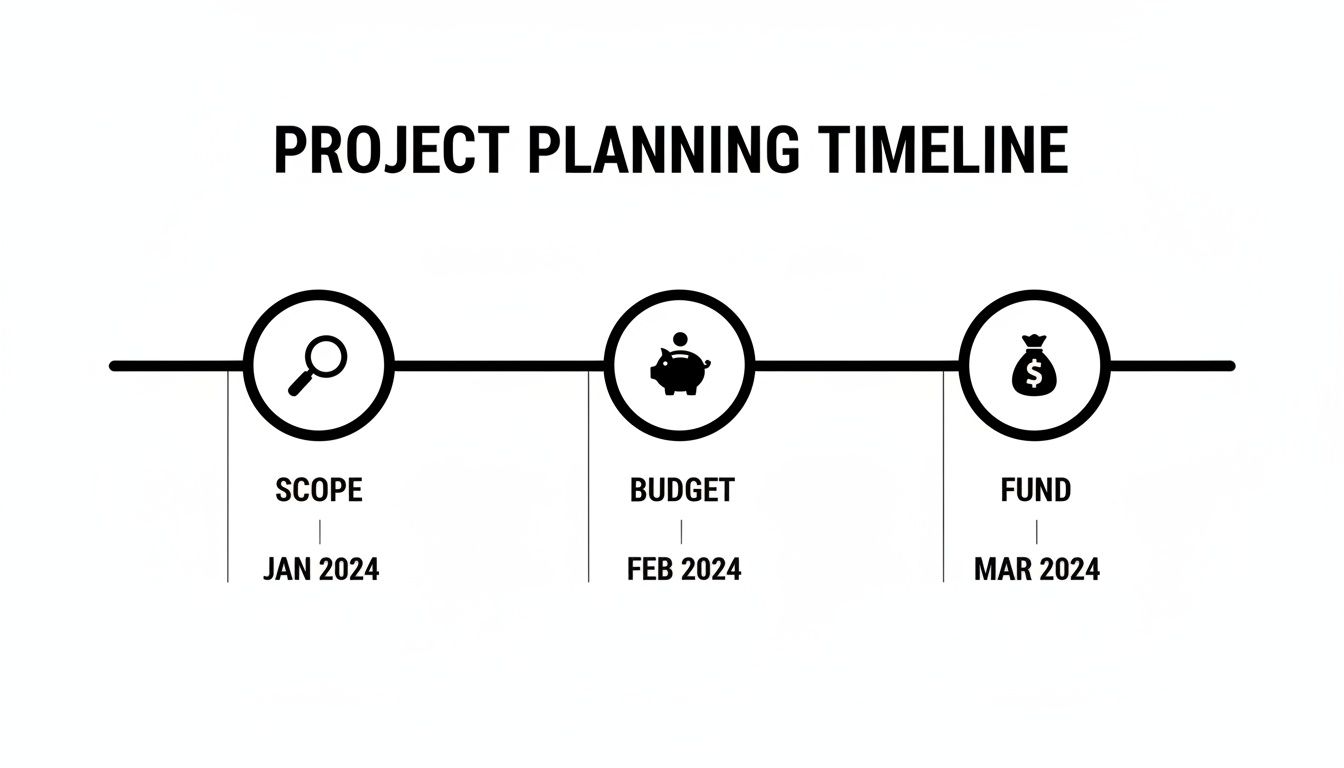
This high-level timeline gives you a bird's-eye view of how those crucial first steps—defining your scope, setting a budget, and securing funding—all fit together before a single wall comes down.
What's the Deal with Permits?
Before you can even think about swinging a sledgehammer, you'll need to navigate the permitting process. This is simply the official step where your local building department reviews and signs off on your plans. It can feel like a bureaucratic headache, but it serves one vital purpose: to ensure your home is safe, structurally sound, and up to current building codes.
You won't need a permit for simple cosmetic updates like painting a room or swapping out a faucet. But for a whole-home overhaul, pulling permits is almost always part of the deal.
Here’s the kind of work that typically requires a permit:
- Structural Changes: Moving, adding, or taking out any load-bearing walls.
- Major System Upgrades: Rerouting plumbing, overhauling your electrical panel, or installing a new HVAC system.
- Expanding Your Footprint: Building an addition or an ADU. For a deep dive into that specific timeline, check out our guide on how long it takes to build an ADU.
- Exterior Work: Putting on a new roof, replacing all the windows, or installing new siding.
Trying to skip this step is a bad idea. It can lead to hefty fines, stop-work orders, and massive headaches when it's time to sell your home.
Getting a Handle on California and Arizona Codes
In states like California and Arizona, local building codes are a major factor in how you plan your renovation. This is particularly true because so much of the housing is older. In fact, nearly half—48%—of owner-occupied homes in the U.S. were built before 1980, pushing the median home age to a mature 41 years. Instead of moving, more and more homeowners are choosing to bring these aging properties up to modern standards.
In California, Title 24 is the big one. It's a strict energy efficiency code that sets the bar for insulation, window performance, HVAC systems, and more. Complying isn't optional; it's a mandatory part of getting your plans approved and helps make homes more energy-efficient.
For instance, if you're replacing windows in California, they must meet specific energy ratings (known as "U-factor" and "SHGC"). Arizona, on the other hand, has tough codes related to water conservation and using materials that can stand up to the desert heat. Your contractor should be an expert on these local rules, making sure your project is compliant from the get-go.
A Typical Renovation Timeline
While no two whole-home renovations are identical, the construction phase almost always follows a predictable path once the permits are in hand. Knowing the general flow helps you know what to expect and when.
Here’s a simplified play-by-play of the construction stages:
- Demo & Prep: The messy but satisfying part—tearing out the old to make way for the new.
- The Heavy Lifting (Structural): Any work on the foundation, framing, or major structural supports happens now.
- Rough-Ins: Plumbers, electricians, and HVAC techs run all the new pipes, wires, and ductwork through the open walls.
- First Look (Inspections): A city inspector comes to approve all the rough-in work before anything gets covered up. This is a critical milestone!
- Closing Up: Insulation goes in, and drywall goes up. Your rooms start to take shape.
- The Pretty Stuff (Finishes): This is when flooring, tile, cabinets, countertops, paint, and light fixtures are installed.
- Final Walk-Through (Inspections): The building department gives their final blessing, officially closing out your permits.
Assembling Your Dream Team and Choosing Materials

Any successful whole-home renovation really comes down to two things: the people you hire and the materials you choose. It’s that simple.
Think of your general contractor as the captain of the ship. They're the ones steering through the project’s complexities, managing the crew, and keeping everything on course. The materials? That’s the very fabric of your new home, defining how it looks, feels, and holds up for years to come.
Getting these two decisions right is the single best way to ensure your project lands on time, on budget, and leaves you with a home you absolutely love. Getting them wrong, on the other hand, is a recipe for costly mistakes and a whole lot of frustration.
Finding and Vetting Your General Contractor
Your relationship with a general contractor isn't a short-term fling; it's a long-term partnership. Finding the right fit is absolutely essential. This isn't the time to just shop for the lowest bid. Instead, your goal should be to find a qualified, trustworthy pro who communicates well and has a portfolio of successful projects just like yours.
Start by asking for recommendations from friends, family, or local architects and designers. Once you have a shortlist of a few names, it's time to do some real digging. Treat this process exactly like a job interview, because that's what it is.
When you sit down with potential contractors, be ready with a list of questions. Here are the absolute must-asks:
- Licensing and Insurance: Ask for their contractor's license number and for proof of general liability and workers' compensation insurance. Don't just take their word for it—verify these credentials with your state's licensing board.
- Experience and Portfolio: You need to see a portfolio of their completed whole home renovation projects. Even better, ask if you can chat with a couple of their recent clients to get a real feel for what it was like to work with them.
- Communication Style: How do they plan to keep you in the loop? Do they prefer daily texts, a weekly email summary, or scheduled on-site meetings? A clear communication plan is the best defense against misunderstandings.
- Subcontractors: Find out if they work with a consistent crew of subcontractors (plumbers, electricians, painters, etc.). A contractor with long-standing relationships usually runs a much smoother, more reliable job site.
The most important quality in a contractor is trust. You need someone who will be honest and transparent every step of the way, especially when unforeseen challenges arise.
Keep your eyes open for any red flags during this process. A contractor who is impossible to get a hold of, gives you a vague bid, or pressures you to sign a contract on the spot is probably not the right partner for a major renovation. Taking the time to properly vet your team is an investment that will pay off a hundred times over. If you need a little more help, our article on hiring the right contractor and avoiding fakes has some great tips.
Understanding Your Construction Contract
Once you've picked your contractor, the next step is the contract. This is the legally binding document that protects both you and the builder. Whatever you do, never start a project on a handshake deal. A detailed, written contract is completely non-negotiable.
Make sure your contract clearly spells out these key pieces:
- Scope of Work: A very detailed description of every single task to be performed, right down to specific material brands and model numbers.
- Payment Schedule: A clear breakdown of when payments are due, tying them to specific project milestones (e.g., foundation poured, framing complete, drywall up).
- Project Timeline: An estimated start date and a projected completion date, along with clauses that address how potential delays will be handled.
- Change Order Process: A formal system for how any changes to the original plan will be priced, approved in writing, and documented.
Choosing Materials for Style and Durability
With your team locked in, the really fun part begins: selecting the materials and finishes that will bring your vision to life. The goal here is to find that sweet spot between aesthetics, long-term durability, and your budget.
Think practically about how you live in each space. A busy kitchen filled with kids and pets has entirely different demands than a formal dining room that's rarely used. High-traffic areas need materials that can take a beating.
Here’s a quick rundown of popular choices for key areas:
- Kitchen Countertops: Quartz is an engineered powerhouse—it's non-porous and incredibly durable, fighting off stains and scratches. Granite is a beautiful natural stone that offers one-of-a-kind patterns, but it does require sealing every so often to keep it from staining.
- Flooring: Luxury Vinyl Plank (LVP) is a fan favorite because it's waterproof, scratch-resistant, and won't break the bank. It's perfect for kitchens, bathrooms, and basements. Hardwood has a timeless beauty and can be refinished down the road, but it is more vulnerable to water damage and dings.
Don't ever feel like you have to go all high-end or all budget. It's smart to mix it up. Splurge on that gorgeous, durable countertop you'll be using every single day, and then save some money on a classic, affordable subway tile backsplash. Making thoughtful material choices is how you ensure your renovated home isn't just stunning on day one, but is truly built to last.
Designing a Home That Works for Your Life
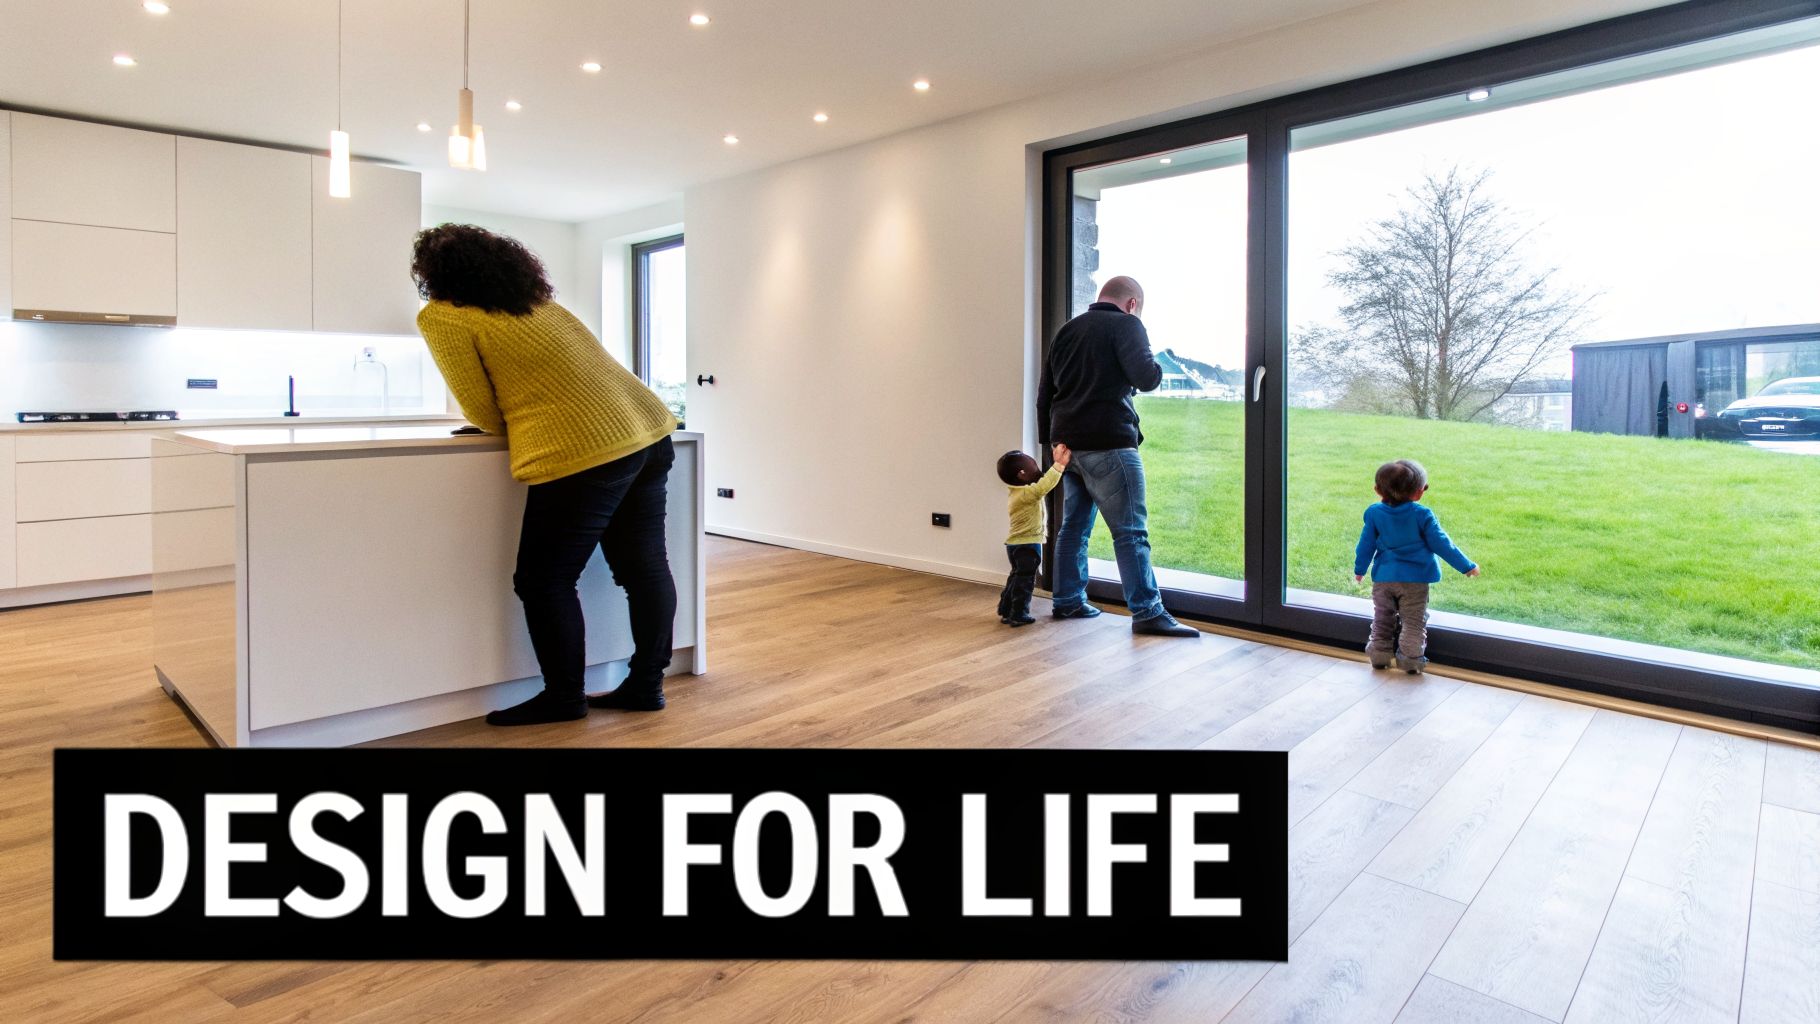
A whole-home renovation is your chance to do something truly special—to rethink how your home actually works for you and your family. Forget just swapping out old countertops for new ones. This is about shaping your space to fit the rhythm of your life, not the other way around.
Think of it this way: your home's current layout is a script for your daily life. Are there awkward scenes where everyone bumps into each other in a narrow hallway? Does the path from the garage to the kitchen with groceries feel like an obstacle course? Good design identifies those friction points and erases them.
The real goal here is to create a home that feels intuitive. It should support how you live, work, and connect without you even having to think about it. This is where you make deliberate, thoughtful choices that pay dividends in comfort and ease for years to come.
High-Impact Strategies for Modern Living
If there’s one game-changer in modern home design, it’s the shift to open-concept living. Taking down a non-load-bearing wall between the kitchen, living room, and dining area can radically transform your home's entire feel. You go from a series of closed-off, sometimes cramped rooms to one bright, airy space that’s perfect for everything from quiet family nights to hosting a crowd.
This layout creates a natural hub for the home where life can happen all at once—someone can be cooking, kids can be doing homework at the island, and others can be relaxing nearby. Of course, a great open plan is more than just a giant room. You have to be smart about defining different “zones” with furniture, rugs, and clever lighting to keep the space from feeling like a warehouse.
Here are a few high-impact ideas we often recommend:
- Nail the Kitchen Work Triangle: This classic design principle ensures your sink, stove, and refrigerator are in an efficient, step-saving formation. It’s a small detail that makes a huge difference every single day.
- Add a Multi-Functional Island: An island is so much more than extra counter space. It’s a prep station, a casual breakfast bar, a homework spot, and the place everyone gathers during a party.
- Blur the Lines Between Indoors and Out: Installing large sliding or folding glass doors is a fantastic way to connect your main living area to a patio or backyard, making both spaces feel larger and more usable.
Maximizing ROI in Kitchens and Bathrooms
Let’s talk about where to put your money for the biggest bang for your buck. Time and time again, kitchens and bathrooms deliver the best return on investment. They are the workhorses of any home, and smart upgrades here not only add serious value but also make your daily routines far more enjoyable.
It’s no surprise that kitchens represent the biggest slice of the global renovation pie, accounting for over 28% of spending in 2024. These projects often see a 70-85% return on investment. With the U.S. remodeling industry on track to hit $164.5 billion by 2025, focusing on these key areas is a proven strategy for boosting your home's value. You can dig deeper into the home improvement market stats if you're interested.
For the kitchen, focus on an ergonomic layout that’s also warm and welcoming. In the bathroom, the goal is often to create a spa-like retreat. Think about features that feel like a luxury but solve practical problems, like a walk-in shower, a freestanding tub, or double vanities to ease the morning rush hour. For some great ideas, check out our guide on the latest kitchen trends you'll want in your home.
Material and Finish Comparison for High-Impact Areas
Choosing the right materials for your kitchen and bathrooms is a balancing act between aesthetics, budget, and real-world durability. Below is a quick comparison of popular options to help guide your decisions.
| Material Type | Best For | Durability | Maintenance | Relative Cost |
|---|---|---|---|---|
| Quartz Countertops | Kitchens & high-traffic baths | Excellent (scratch & stain resistant) | Very Low (non-porous) | High |
| Granite Countertops | Kitchens demanding a natural look | Very Good (heat resistant) | Moderate (requires sealing) | High |
| Porcelain Tile | Bathroom floors & shower walls | Excellent (waterproof, durable) | Low (grout needs cleaning) | Moderate |
| Luxury Vinyl Plank (LVP) | Kitchen & bath floors | Very Good (waterproof, scratch resistant) | Very Low (easy to clean) | Low-Moderate |
| Custom Wood Cabinetry | Kitchens for a premium feel | Good (can dent or scratch) | Moderate (requires gentle cleaning) | Very High |
| Laminate Countertops | Budget-conscious projects | Fair (can scratch & chip) | Low (easy to clean) | Low |
Ultimately, the best choice depends on how you use the space. A busy family kitchen might benefit from indestructible quartz, while a guest bath could be the perfect place for a more delicate but beautiful material.
Integrating an Accessory Dwelling Unit
Our lives change, and sometimes our homes need to change with them. Accessory Dwelling Units (ADUs)—also known as granny flats or in-law suites—are a fantastic solution that more and more homeowners are including in their renovation plans. They offer incredible flexibility, whether you need a private space for aging parents, a dedicated home office, a guesthouse, or a new source of rental income.
Adding an ADU isn't just about building a small house in the backyard. The key is to plan it as an integrated part of your property, so it complements the main home rather than feeling like an afterthought.
A well-designed ADU feels like a natural extension of the property, not a separate, tacked-on structure. This means matching architectural styles, using complementary materials, and creating thoughtful landscaping to connect the two spaces.
Whether you build a detached unit or convert an existing garage, an ADU is a powerful way to add valuable square footage and make your property far more adaptable for whatever the future holds.
Managing the Construction Phase and Final Touches
With your plans finalized and permits in hand, the project moves off the page and into your home. This is where the real work begins. The construction phase is easily the longest and most disruptive part of the journey, but the right mindset and a few smart strategies can make all the difference. Think of yourself as the project's CEO—you don't need to swing a hammer, but your oversight and communication are absolutely critical.
Living through the dust, noise, and a revolving door of contractors is a real test of patience. While many homeowners choose to move out temporarily, plenty of people stay put, which just requires some clever planning. Most contractors will advise against it for safety and efficiency, but if you have to stay, setting up a "safe zone" is non-negotiable.
This dust-free zone should have everything you need to get by, like a temporary kitchen with a microwave, a hot plate, and a mini-fridge. You'll also want to establish clear boundaries and work hours with your crew to maintain some sense of normalcy and respect for your living space.
Staying on Track and Handling Changes
Clear and consistent communication is the secret sauce for a smooth construction phase. Set up a regular rhythm for check-ins with your general contractor, whether it’s a quick daily text update or a more formal weekly meeting on-site. This keeps you in the loop on progress, gives you a chance to ask questions, and helps you nip small issues in the bud before they grow into big problems.
Now, even the most flawlessly planned project hits a snag or two. You might stand in the newly framed-out space and realize you desperately want another window, or the crew might open up a wall and uncover an unexpected plumbing issue. This is exactly what a formal change order process is for.
A change order is a written document that details any change from the original contract. It spells out the new work, the cost (or savings), and how it will affect the timeline. Never, ever agree to a change based on a verbal promise alone. Getting it in writing protects everyone involved.
This simple piece of paper ensures there are no nasty surprises on your final bill and that everyone is on the same page. It’s a powerful tool for keeping your renovation budget from spiraling out of control.
The Final Stretch and the Punch List
As the dust settles and the last light fixtures are hung, it's time for one of the most satisfying steps: the punch list walk-through. This is a formal inspection you do with your contractor to spot any last-minute fixes or incomplete items before you hand over that final payment.
This is your moment to be picky. Get up close and look for things like:
- Paint drips, smudges, or scuffs on walls and trim
- Cabinet doors or drawers that don't open and close smoothly
- Cracked or missing tile grout
- Scratches or dings on new countertops or flooring
- Light switches, outlets, or appliances that aren't working correctly
Create a detailed list—the punch list—for your contractor to work through. Once every item is completed to your satisfaction and the final city inspections are signed off, you can officially call the project complete. Don't forget to collect all the warranties for your new appliances, windows, and other major materials. This final, detailed review ensures the home you envisioned is the one you get to move back into.
Burning Questions About Whole-Home Renovations
Even with the most detailed blueprint in hand, a whole-home renovation can feel like you're assembling a giant puzzle without the box lid. It’s completely normal to have questions pop up along the way. Let's tackle some of the most common ones we hear from homeowners, so you can move forward with clarity and confidence.
What's the Best Time of Year to Start?
Timing your project is a strategic move that can seriously impact your schedule and budget. While you can technically start anytime, most experienced contractors will tell you that late spring or early summer is the sweet spot.
The weather is on your side, which means fewer delays from rain, especially when you're dealing with foundation work or anything that opens your home to the elements. Materials like paint, caulk, and sealants also cure much more effectively in warmer, drier weather. Just remember, this is also peak season for construction, so you'll want to lock in a great contractor well in advance.
What Are the Biggest Unexpected Costs I Should Brace For?
No matter how carefully you plan, every renovation has its secrets. The most common and costly surprises are almost always lurking behind the drywall.
Here are the usual suspects:
- Archaic Electrical Wiring: Finding old knob-and-tube or aluminum wiring that doesn't meet modern safety codes is a classic discovery. This isn't an optional fix; it has to be brought up to code.
- Hidden Water Damage: A tiny, slow leak from decades ago can lead to major rot in your subfloors and framing, turning a simple project into a significant structural repair.
- DIY Structural "Mistakes": Sometimes, you uncover that a previous owner took out a load-bearing wall without adding the right support. This discovery immediately triggers the need for expensive engineering and structural work.
This is exactly why that 15-20% contingency fund isn't just a nice-to-have—it's your project's essential safety net. Think of it as insurance against the unknown.
Do I Really Need to Move Out? How Long?
This is the big lifestyle question: stay or go? While living on-site can save you a chunk of change on rent, for a full-scale home renovation, nearly every professional will tell you to move out. The reality of living with constant dust, deafening noise, and no kitchen or bathroom is more than just an inconvenience; it's a massive source of stress.
For a whole-home project, your best bet is to plan on vacating the property from demolition day straight through to the final walkthrough. It’s safer, more efficient, and preserves your sanity.
Giving your crew an empty house means they can work faster and more effectively, without having to navigate around your family's daily life. You should plan on being out of your home for the entire construction timeline, which typically runs anywhere from 6 to 12 months, sometimes longer for very complex projects. Factoring temporary housing costs into your initial budget from day one is one of the smartest moves you can make.
Planning a major renovation is a huge undertaking, but you don't have to figure it all out on your own. The team at NorCal Construction has the expertise to guide you through every phase, from the first sketch to the final, beautiful reveal. Start your transformation with us today.
Published via Outrank tool