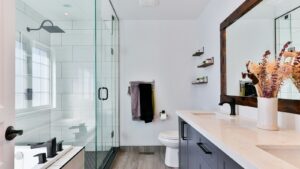

Yes, a bathroom renovation under $3,000 is feasible, but only as a same-layout cosmetic or selective-component refresh, not a full remodel with plumbing or layout changes. In the 2019 American Housing Survey, homeowners spent a median of $5,000 on bathroom remodels, up from a $3,300 median in the earlier 2011–2019 comparison, so this ceiling already sits under what a typical project cost.
The advice you see most often treats three thousand dollars as a miniature full remodel: buy the cheapest materials, do all the labor, and the room will come out new. That advice fails the moment a wall, a drain, or a circuit moves. In the East Bay, permits and labor show up before the pretty parts do. Keeping the existing layout saves more than hunting for the lowest-priced tile.
A workable plan is a written scope, a call to the building department, and cash held back for whatever the walls are hiding. Buying the vanity before those three steps is how a refresh turns into a repair.
Table of Contents
- What a Bathroom Renovation Under $3 000 Really Buys
- Locking Your Scope and Permits Before Spending
- Renovation Sequence From Demo to Final Checks
- Spending Smart on Paint Fixtures and Finishes
- Deciding What to DIY and What to Hire Out
- Budget Mistakes That Derail a $3 000 Renovation
- Your Next Step Toward a Finished Bathroom
What a Bathroom Renovation Under $3 000 Really Buys
Treat $3,000 as a scope, and the budget works. Treat it as a coupon for a full remodel, and the first opened wall ends the project.
National survey data puts a typical bathroom remodel well above this ceiling, and adding a bathroom where none existed costs far more than refreshing one. A renovation under $3,000 sits outside both categories: a tight refresh of a room that already functions.
Three tiers, not one sliding scale
Every task list lands in one of three tiers. The tier decides whether the budget survives contact with the room.
Cosmetic refresh. Paint, mirror, lighting, hardware, caulk, accessories. The plumbing, shower receptor, and floor plan stay put. This tier reliably fits, and it is the only one where finish upgrades still leave cash in reserve.
Component replacement. A vanity or toilet swapped in the same spot, sometimes like-for-like shower trim. The result reads as a bigger change than paint. The trap is a "swap" that needs a different drain height or a relocated supply line. On the small-bath jobs I scope in the East Bay, touching those lines typically pulls the work into permit territory, and permit territory rarely fits this ceiling.
Wet-area or layout work. Moved walls, relocated drains, new circuits, rebuilt showers. Labor and inspections break this budget before finishes enter the conversation. Old tile comes off, the substrate turns out soft, and the repair eats whatever a bargain faucet saved.
| Scope tier | What it includes | Fits under $3,000 |
|---|---|---|
| Cosmetic refresh | Paint, mirror, lighting, hardware, caulk, accessories | Yes, if the layout stays |
| Component replacement | Vanity or toilet in the same location, limited fixture swaps | Often, if plumbing does not move |
| Wet-area or layout work | Rebuilt shower, moved drains, wall or circuit changes | Generally no |
Practical rule: Pick the tier before the finish grade. Economy tile in a relocated shower still costs more than a better mirror on the wall you already have.
Guests notice the light, the mirror, the hardware, and fresh caulk. The original valve behind the wall draws no attention. If your list includes shower-wall demolition or a new drain location, the list belongs to the third tier. Shrink the list rather than betting that a cheaper product pulls layout work back under the ceiling.
Locking Your Scope and Permits Before Spending
Money stays in your account until four decisions are written down. Skip one and the budget stops being a budget.
- Fixed scope list. Write every task in the room: paint, lighting, mirror, accessories, vanity, toilet, or like-for-like shower parts. If it isn't on the list, it isn't in the project.
- Local building department. Call before demolition and ask which of those lines need a permit. Don't guess from a neighboring city's handout.
- $3,000 budget tier. Set the ceiling and name the tier from the previous section. A cosmetic list and a shower rebuild can't share the same number.
- No-surprise plan. State what is included, what is excluded, and what stops the job if you open a wall and find damage.

What California cities commonly flag
Rancho Palos Verdes bathroom remodel requirements are a useful example of how municipal rules read. Permits are commonly required when a remodel changes or replaces wallboard, shower or tub enclosures, cabinets, fixtures, plumbing, or electrical systems. Some same-location fixture replacements may be exempt, and that exemption is local, not universal. Older houses in the Bay Area are where hidden defects show up after the permit question, not before it.
One California city publishes bathroom permit and inspection costs of roughly $800–$1,100. That fee alone can push a component swap back down to paint and hardware. Confirm your city's number before you buy finishes.
Code items also shape the shopping list, not just the paperwork. California guidance commonly calls for a dedicated 20-amp bathroom receptacle circuit, GFCI protection, and at least one receptacle within 3 feet of the basin. Water-conserving fixtures are capped at 1.28 gallons per flush for toilets, 1.8 gallons per minute for showerheads, and 1.2 gallons per minute for lavatory faucets. A non-compliant toilet you already paid for is a wasted line item.
Hold a contingency for concealed damage. You don't need a large slice of a small budget to matter. You need enough that a soft spot at the valve doesn't force a panic demo. A bathroom remodel planning checklist is worth running against your city's answers so the written scope and the permit reality match. If the fee plus one likely repair would blow the ceiling, cut scope now.
Renovation Sequence From Demo to Final Checks
Work follows the building, not the shopping list. Cover a defect and you pay to reopen a finished wall.

Photograph before you cover anything
Before demolition, look at the subfloor, framing, valve connections, and shower-wall substrate. Staining, softness, corrosion, or mold is a stop, not a note for later. Photograph every condition while it is still visible. Those photos are what you compare against if a leak shows up after the new caulk looks perfect.
Then demolish only what the scope named. A careful cosmetic strip, old mirror, tired trim, loose caulk, is different from opening the wet wall "while you're in there." Rough repairs come next, and only for what the inspection found. If a permit applies, get the required look at rough work before you close anything. Wall repair follows. Finish installation is last, not first.
Waterproofing is not a paint color
Don't set tile directly over ordinary drywall in a wet shower. Use a code-accepted moisture-resistant backer or a listed waterproofing system. Treat seams and fastener penetrations the way the manufacturer specifies, not the way a forum shortcut describes. Keep a continuous waterproof transition at corners, niches, and the tub or shower receptor. A new shower assembly with substrate repair is exactly the kind of replacement that walks past a $3,000 ceiling. If the existing receptor and valve locations are sound, leave them.
Ventilation belongs in this sequence, not as a decor afterthought. Contra Costa County residential bathroom remodel guidance specifies an exhaust fan with a minimum 50 CFM airflow in many remodel scenarios, even where an operable window exists. Confirm the fan discharges outdoors. A fan that dumps into the attic is not ventilation.
What has to pass before the last bead of caulk
Use a bathroom remodel checklist as the closeout, not as a shopping reminder. The acceptance pass is short and strict:
- Leak test: Run every new supply and drain connection and watch the joints, not just the fixture.
- Shower spray test: Soak the wet area before the final caulk so a missed transition shows up while you can still reach it.
- Exhaust path: Verify the air leaves the building, not a joist bay.
- GFCI trip and reset: Test the protected receptacle you already confirmed with the building department, and look at tile transitions and sealant continuity in the same pass.
These checks exist to stop the expensive pattern of sealing a defect and cutting the finish back open.
Spending Smart on Paint Fixtures and Finishes
Scope control keeps you under the ceiling. Allocation decides whether the room looks finished. Spend where a standing person looks, and stop when the next dollar only improves a surface nobody studies.
What changes the room for the least disturbance
Start with a moisture-rated bathroom paint, a new vanity light, and a mirror that fits the existing lavatory width. Swap cabinet hardware and, if the holes and supplies already match, the faucet. Recaulk the sink, the tub rim, and the base of the toilet. Refresh the towel bar, robe hook, and toilet-paper holder so the metals agree. None of that asks a drain to move.
That cluster usually does more for a dated bath than one expensive surface. A room with fresh paint, a clear mirror, and matched hardware reads as maintained. A room with one new slab of stone and the original rusty bar still reads as unfinished.
Opportunity cost inside one ceiling
Every dollar on a vanity is a dollar that isn't on the surround, the light, or the toilet. Weigh the choice by what a guest sees in the first ten seconds, not by which product has the longer warranty card.
| Upgrade | What you notice | What it disturbs | When it wins |
|---|---|---|---|
| Paint, mirror, light, hardware, caulk | Almost the whole room at eye level | Almost nothing concealed | The bath works and only looks tired |
| Same-location vanity | Storage, counter, and the sink view | Supply and drain only if they already line up | The cabinet is swollen or the top is ruined |
| Comfort-height toilet, same flange | Daily use, not the postcard view | The closet flange you already have | The bowl is cracked, loose, or wastes water |
| Reglaze or accent tile | The wet wall, if you stand in the shower | Substrate, waterproofing, and often a permit | Only after the backer is confirmed sound |
Shop in-stock and remnant pieces that match the openings you have. A special-order mirror that needs a resized light box is a layout change wearing a decor label. Don't spend the whole budget on one surface while the rest of the room still looks like the year it was built. If the vanity is fine and the caulk is black, buy the caulk.
A cheap finish on five tired surfaces beats a showpiece that leaves the other four untouched.
Deciding What to DIY and What to Hire Out
DIY is not automatically the bargain under this ceiling. It is a bargain only on work you can undo.

The line that keeps the savings real
Safe to do yourself when you are careful: painting, hardware, mirrors, accessories, recaulking sound joints, and cosmetic demolition that doesn't open a wet wall or a circuit. These tasks are reversible. A bad paint cut gets repainted. A crooked hook gets moved.
Hire it out when a mistake hides: waterproofing, supply and drain changes, valve replacement, new circuits, and ventilation that has to reach the exterior. A missed seam can sit behind tile for months and then show up as mold, a ceiling stain below, or a failed inspection. Electrical mistakes add a fire risk, not just a cosmetic one. Doing that work yourself to "save the labor" is a false economy. You spent the materials and you still owe the repair.
National reporting puts typical permit costs at roughly $100–$1,000, while moving plumbing alone can add about $3,000–$8,000, enough to consume or exceed this entire target, according to a bathroom remodel cost breakdown. The same spending survey found that more than half of homeowners hit surprise expenses, led by materials and labor. That is the math. A plumbing move doesn't trim your project. It replaces it.
Screen the room before you buy the pretty parts
Run this before the finish order, not after the first Saturday of demo:
- Water damage: Look for stains, soft floor, and swollen vanity sides.
- Shutoff valves: Confirm they close fully. A seized stop turns a faucet swap into an emergency.
- Shower substrate: If you can't see it without destroying a sound wall, don't destroy the wall to satisfy curiosity.
- Ventilation: Confirm the fan runs and leaves the house.
- Permits: Match the task list to the local triggers you already called about.
Cosmetic DIY preserves cash for the licensed portion. A remodeler who already pulls permits in the East Bay can own the regulated slice while you handle paint and hardware. If you want that split written into the scope, talk with bathroom remodeling specialists before you schedule demolition, not after an inspection fails. The useful question isn't "can I do this?" It is "if I do this wrong, can I still see the mistake on Monday?"
Budget Mistakes That Derail a $3 000 Renovation
The overruns aren't mysterious. HomeAdvisor's bathroom remodel cost guide places a typical bathroom remodel at about $12,153, with labor commonly 40%–65% of the total. A 2025 homeowner survey found 47% of respondents budgeting $10,000–$25,000, and materials and labor were the leading causes of overruns. Under $3,000 isn't a discount version of that project. It survives only when you disturb fewer systems.
These are the moves that double the job, and the fix for each.
Moving drains, supplies, or walls. Plans, inspections, and code upgrades follow the pipe. Leave the fixture where it is, or admit you are no longer on this budget.
Skipping the permit check. You pay the fee later, plus rework if an inspector opens what you finished. Call before you buy.
Ordering finishes before the walls are open. A ruined subfloor doesn't care that the tile is nonrefundable. Inspect, then purchase.
Tiling over ordinary drywall in the shower. The wall looks done until it doesn't. Backer or a listed waterproofing system, or don't tile the wet area.
Spending the full amount with nothing held back. One concealed repair and you are borrowing from the next room. Keep a contingency even if it means a simpler mirror.
Buying one showpiece and starving the rest. A statement vanity in a room with failed caulk and a dark, old light still looks dated. Spread the money across what people see.
The cheapest project is rarely the one with the cheapest products. It is the one that leaves drains, walls, and circuits alone.
If a change requires a new plan set, it doesn't belong in this budget.
Your Next Step Toward a Finished Bathroom
The whole plan is one decision repeated. Keep the layout. Pick a tier that matches that choice, write the scope, clear permits, and only then buy materials. Sequence the work so defects are photographed and tested before caulk hides them. Put money on paint, light, mirror, hardware, and same-location fixtures. Keep your own labor on tasks you can reverse, and hand waterproofing, plumbing changes, electrical work, and ventilation to someone licensed.
The East Bay fees and older houses will tell you quickly whether your specific bath can stay under the ceiling. A scoped look at your layout, your city's permit cost, and the condition behind the finishes is the practical next step. Ask for that split in writing: cosmetic work you can do, and regulated work that protects the room. If the answer requires a moved drain, you have learned something useful before you spent the $3,000.
NorCal Construction handles permitting, design, material selection, and construction management for bathroom remodels across the East Bay, including same-layout refreshes that have to stay on a tight budget. A scoped estimate can show what your bathroom, local fees, and existing conditions will allow, and which tasks belong with you versus a licensed crew. Visit NorCal Construction to request that estimate before you commit the budget.